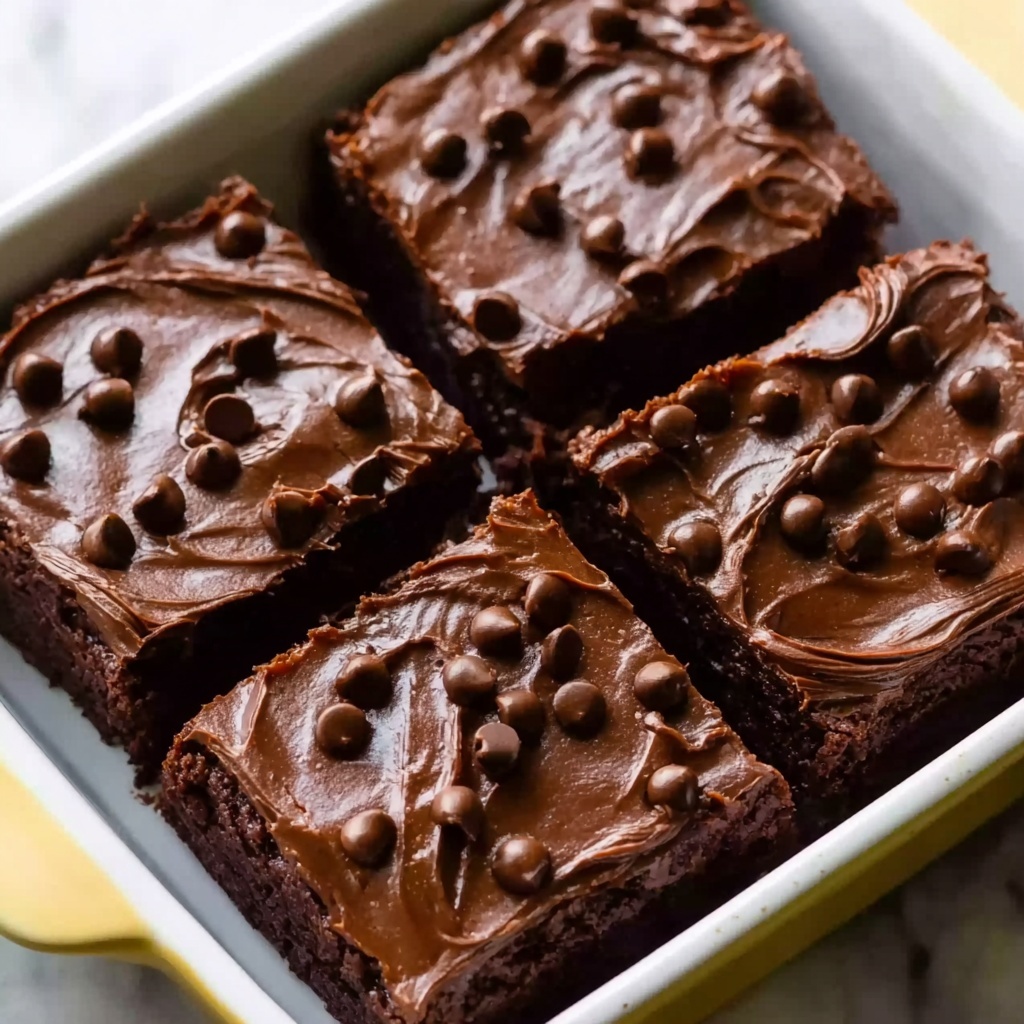
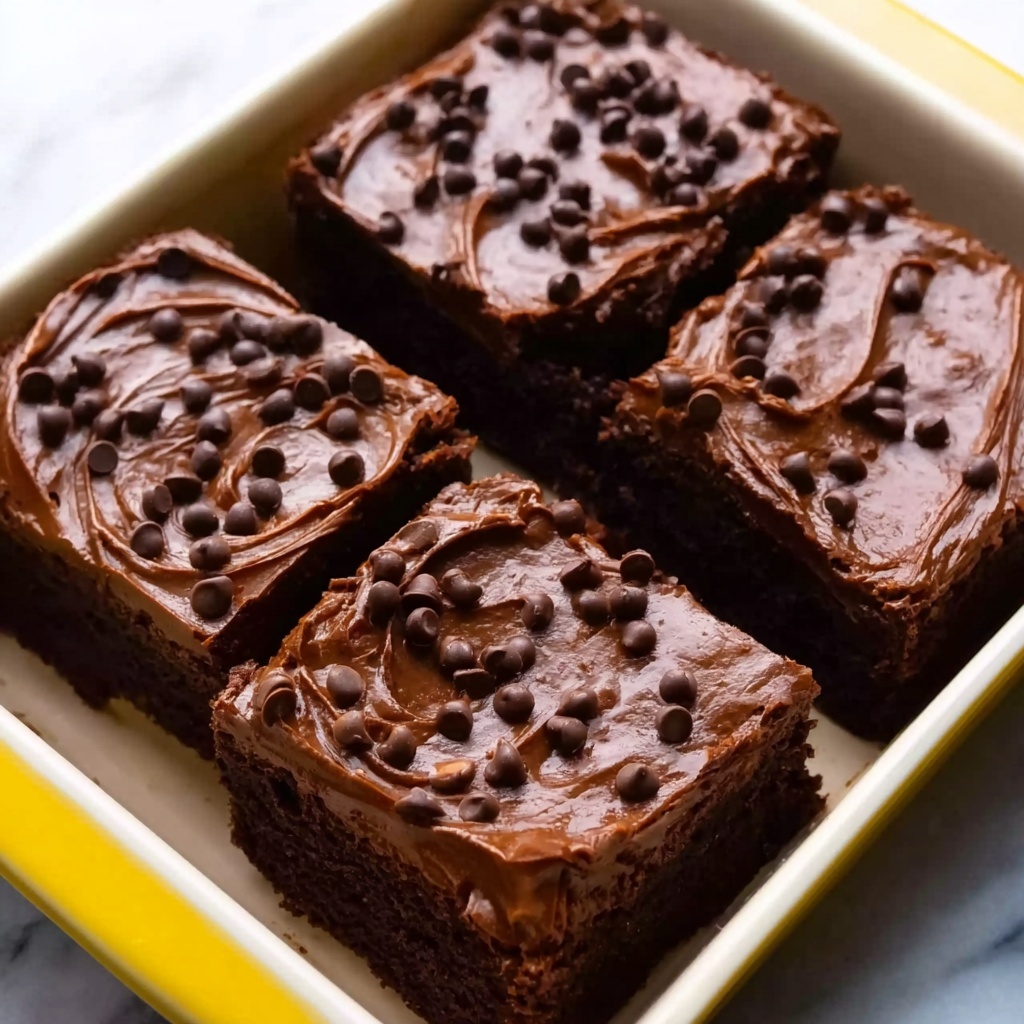
If you’ve been hunting for the perfect guilt-free yet indulgently delicious boost, this Chocolate Workout Bars Recipe is exactly what your snack game needs. Creamy peanut butter meets rich cocoa, gently sweetened with honey and a touch of natural syrup, creating bars that are as energizing as they are comforting. These bars are packed with wholesome ingredients that fuel your body and satisfy your sweet tooth, making them a fantastic choice before or after any workout or simply whenever you need a quick pick-me-up. Trust me, once you make these, they’ll become your go-to snack for every occasion.
Ingredients You’ll Need
The magic of this Chocolate Workout Bars Recipe lies in its simple, purposeful ingredients. Each one plays a crucial role — from the luscious creaminess of the nut butter to the subtly bitter java of cocoa powder, to the body and bite provided by oat flour. Together, they build the perfect balance of texture, flavor, and nutrition.
- 1/2 cup peanut butter or almond butter: Provides creamy richness and healthy fats for lasting energy.
- 1/4 cup honey, maple syrup, or agave syrup: Natural sweetness that binds everything beautifully.
- 1/4 cup unsweetened cocoa powder: Adds deep chocolate flavor without overpowering sweetness.
- 1/2 cup oat flour: Offers a wholesome, chewy texture and a subtle nutty taste.
- 1/4 cup protein powder (optional): Boosts protein content to help muscle recovery and fullness.
- 1/4 tsp salt: Enhances all the flavors and balances the sweetness.
- 2 tbsp milk of choice, as needed: Loosens the dough just enough for perfect consistency.
- 1/4 cup mini chocolate chips (optional): Adds delightful bursts of melty chocolate for extra indulgence.
How to Make Chocolate Workout Bars Recipe
Step 1: Prepare Your Pan
Start by lining an 8×8-inch baking pan with parchment paper. This step is essential because it ensures your bars will lift out easily once they’re set, making slicing and serving a breeze.
Step 2: Combine the Wet Ingredients
In a mixing bowl, stir together your peanut butter (or almond butter), honey (or chosen syrup), and unsweetened cocoa powder until the mixture is smooth and glossy. This blend forms the rich chocolate base of your bars and sets the tone for that irresistible flavor.
Step 3: Mix in the Dry Ingredients
Add the oat flour, protein powder if you’re using it, and salt to your chocolate mixture. Stir everything until you achieve a thick dough. This dough should hold together firmly but remain pliable.
Step 4: Adjust Consistency with Milk
If the dough feels too dry and crumbly, slowly add your milk of choice one tablespoon at a time. This little trick gets your dough to just the right consistency—soft enough to press into your pan but firm enough to hold shape as bars.
Step 5: Add Chocolate Chips
Gently fold in the mini chocolate chips if you want an extra chocolatey pop. This optional step takes the bars from delicious to downright decadent, creating melty pockets of chocolate in every bite.
Step 6: Press and Chill
Transfer your dough into the prepared pan, pressing it down evenly to create a smooth, uniform surface. Pop the pan into the refrigerator and let it chill for at least 1 hour. This step helps everything set perfectly, so your bars cut cleanly.
Step 7: Slice and Enjoy
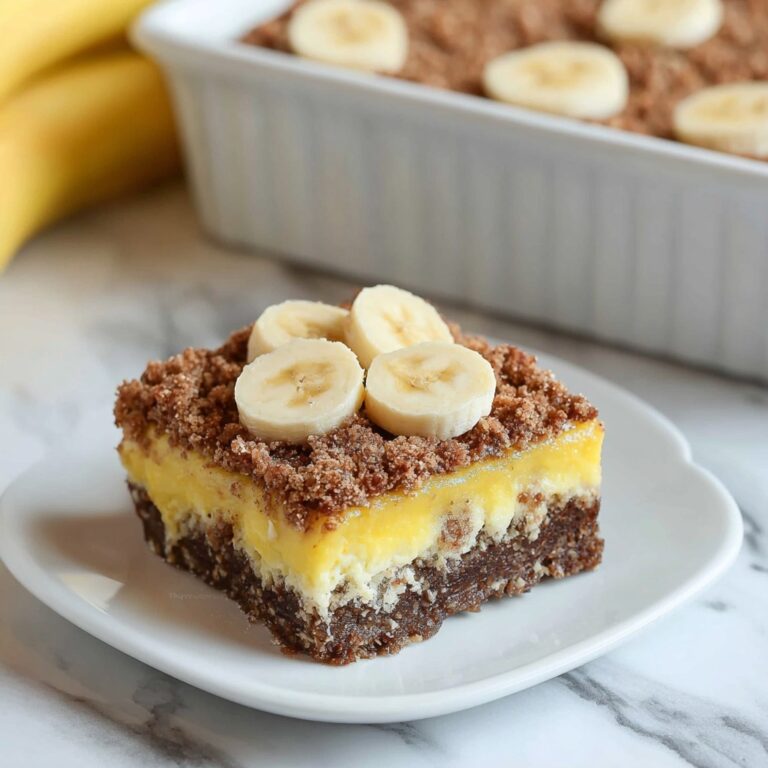
Once chilled and firm, lift the parchment paper from the pan and slice your creation into eight satisfying bars. Now it’s time to fuel your body with a chocolatey delight that’s both energizing and satisfying.
How to Serve Chocolate Workout Bars Recipe

Garnishes
Sprinkle a pinch of flaky sea salt or a few extra mini chocolate chips on top before serving for a simple, elegant touch. These small garnishes elevate the look and flavor, making your bars feel like a special treat every time.
Side Dishes
Pair these bars with a glass of cold milk, a cup of your favorite coffee, or a refreshing smoothie for an energizing snack break. They also complement a bowl of fresh fruit perfectly if you want a touch of natural sweetness alongside.
Creative Ways to Present
For a fun twist, wrap individual bars in parchment paper or colorful wax paper tied with twine. These make fantastic grab-and-go snacks or thoughtful homemade gifts for friends who appreciate a tasty workout boost.
Make Ahead and Storage
Storing Leftovers
After slicing, store your Chocolate Workout Bars in an airtight container in the refrigerator. They’ll stay fresh and chewy for up to a week, ready whenever you need a quick energy boost.
Freezing
You can freeze these bars for longer storage by wrapping each one tightly in plastic wrap and placing them in a freezer-safe bag. When properly stored, they’ll keep well for up to three months and thaw quickly at room temperature.
Reheating
There’s really no need to reheat these bars—they’re delicious straight from the fridge or freezer. But if you want that gooey chocolate chip experience, simply microwave for 10–15 seconds and enjoy warm and melty.
FAQs
Can I use other nut butters besides peanut or almond?
Absolutely! Cashew, sunflower seed, or even tahini can work wonderfully here. Just pick something creamy with a flavor you love to keep the bars moist and tasty.
Is the protein powder necessary in the Chocolate Workout Bars Recipe?
Nope! The protein powder is totally optional but adds a bit of extra muscle-fueling power. If you don’t have any on hand, just skip it—the bars will still be delicious and satisfying.
Can I make these bars vegan?
Yes, simply use maple syrup or agave in place of honey and choose a plant-based milk. These swaps keep the bars 100% vegan-friendly without sacrificing flavor or texture.
What’s the best way to keep these bars from being too dry or crumbly?
Adding milk one tablespoon at a time helps get the dough just right. Also, using fresh peanut or almond butter ensures creaminess, preventing dryness in your bars.
How long should I refrigerate the bars before slicing?
At least one hour is ideal to let them firm up properly. If you’re short on time, 30 minutes can work too, but longer chilling creates cleaner slices and a better texture.
Final Thoughts
If you’re craving a homemade snack that combines energy, flavor, and a chocolate fix, you simply must try this Chocolate Workout Bars Recipe. It’s straightforward, customizable, and delivers every time. Once you have a batch ready in your fridge, you’ll be amazed at how perfectly it fits into your busy lifestyle—whether for a quick workout boost or an anytime treat. Happy baking and happy snacking!
Print
Chocolate Workout Bars Recipe
- Prep Time: 15 minutes
- Cook Time: 0 minutes
- Total Time: 1 hour 15 minutes
- Yield: 8 bars
- Category: Snack
- Method: No-Cook
- Cuisine: American
- Diet: Gluten Free
Description
These no-bake Chocolate Workout Bars are a perfect, energy-boosting snack packed with protein, healthy fats, and rich chocolate flavor. Made with peanut or almond butter, natural sweeteners, oat flour, and optional protein powder, they set quickly in the fridge for a convenient post-workout treat or anytime snack that’s both satisfying and wholesome.
Ingredients
Main Ingredients
- 1/2 cup peanut butter or almond butter
- 1/4 cup honey, maple syrup, or agave syrup
- 1/4 cup unsweetened cocoa powder
- 1/2 cup oat flour
- 1/4 cup protein powder (optional)
- 1/4 tsp salt
- 2 tbsp milk of choice, as needed
- 1/4 cup mini chocolate chips (optional)
Instructions
- Prepare the Pan: Line an 8×8-inch baking pan with parchment paper to prevent sticking and make removing the bars easier.
- Mix Wet Ingredients: In a mixing bowl, combine the peanut butter, honey (or chosen syrup), and cocoa powder. Stir thoroughly until the mixture is smooth and evenly blended.
- Add Dry Ingredients: Stir in oat flour, protein powder (if using), and salt. Mix everything together until a thick dough forms.
- Adjust Consistency: If the dough seems too dry, gradually add milk of choice one tablespoon at a time until the mixture holds together but isn’t sticky.
- Add Chocolate Chips: Fold in the mini chocolate chips for added texture and bursts of chocolate flavor, if desired.
- Press Mixture: Evenly press the dough into the prepared pan, smoothing out the top with a spatula or your hands to create an even layer.
- Chill to Set: Place the pan in the refrigerator and chill for at least 1 hour to allow the bars to firm up properly.
- Slice and Store: Once set, remove the bars from the pan using the parchment paper edges, slice into 8 bars, and store them in an airtight container in the refrigerator for freshness.
Notes
- You can substitute peanut butter with almond butter or any nut/seed butter of your choice.
- Maple syrup, honey, or agave syrup can be used based on your dietary preference or availability.
- Oat flour can be made at home by grinding rolled oats if unavailable.
- Protein powder is optional but recommended to boost protein content for workout recovery.
- Milk of choice can be dairy or any plant-based milk to adjust dough consistency.
- Mini chocolate chips add sweetness and texture but can be omitted for a healthier option.
- Store bars in the refrigerator for up to one week or freeze for longer storage.

