
If you are looking to elevate your baking game with a frosting that’s smooth, luxurious, and unbelievably creamy, then the Perfect Russian Buttercream Recipe is your new best friend. This buttercream is a silky blend of rich butter and silky meringue that melts on your tongue, creating a frosting experience that’s a total showstopper. Whether you’re dressing up Funfetti Blondies or any other treat, understanding how to master this buttercream will transform your baked goods from delightful to absolutely divine.
Ingredients You’ll Need
The beauty of the Perfect Russian Buttercream Recipe lies in its simplicity—the ingredients are few but mighty, each playing a crucial role to ensure that smooth, creamy texture and decadent taste you’ll crave. Here’s what you need to gather before starting:
- Unsalted butter: Use high-quality, softened butter for a rich and smooth base that whips up beautifully.
- Egg whites: Fresh egg whites must be at room temperature to achieve that perfect meringue stability.
- Granulated sugar: This adds the necessary sweetness and helps to stabilize the meringue for silky results.
- Vanilla extract: Pure vanilla enhances the buttery richness with a subtle, comforting aroma.
- Optional flavorings or colorings: Customize your buttercream with extracts or gel food colors for extra flair.
How to Make Perfect Russian Buttercream Recipe
Step 1: Prepare Your Ingredients
Start by bringing your butter to room temperature so it is soft enough to whip without melting. Separate your egg whites carefully, ensuring no yolk contaminates them, and have all your ingredients measured out for a smooth process ahead.
Step 2: Whip the Egg Whites and Sugar
Using a stand mixer or hand mixer, beat the egg whites on medium speed until they begin to foam. Gradually add the sugar and continue to whip on high until the mixture is glossy and forms stiff peaks. This meringue base is what lends the buttercream its uniquely light yet stable structure.
Step 3: Beat in the Butter
Now comes the magic moment: slowly add your softened butter into the meringue, one tablespoon at a time. Keep the mixer running at medium speed, allowing the butter to fully incorporate before adding more. Don’t worry if the mixture looks curdled at some point—just keep beating, and it will come together into a silky, luscious frosting.
Step 4: Add Flavor and Final Touches
Once all the butter is combined, mix in your vanilla extract or any other flavorings. At this stage, you can also add gel coloring if desired. Whip the buttercream a minute more to ensure everything is perfectly blended and fluffy.
How to Serve Perfect Russian Buttercream Recipe
Garnishes
To elevate your creation, consider garnishing with colorful sprinkles, edible glitter, or delicate edible flowers that contrast beautifully with the creamy texture and neutral vanilla tone of the buttercream. These little touches will make each bite feel like a celebration.
Side Dishes
Pair your frosted treats with a hot cup of coffee or tea to balance the richness of the Perfect Russian Buttercream Recipe. Fresh berries or a tart fruit compote can also provide a refreshing counterpoint that highlights the buttery sweetness.
Creative Ways to Present
Try piping the buttercream using different nozzle tips to create rosettes, ruffles, or shells that turn your cake or blondies into a work of art. Layer it between cake tiers or spread it thickly over cupcakes for a visually stunning and tasty dessert experience.
Make Ahead and Storage
Storing Leftovers
If you have buttercream left over, place it in an airtight container and store it in the refrigerator for up to 3 days. Before use, bring it back to room temperature and re-whip to restore its fluffy texture.
Freezing
You can freeze the Perfect Russian Buttercream Recipe in a sealed container for up to 2 months. Thaw in the fridge overnight, then whip again before decorating to ensure it’s smooth and creamy.
Reheating
Since this buttercream is best served cool or at room temperature, avoid heating it directly. Instead, gently bring it back to room temperature, then beat with an electric mixer to revive its silky consistency.
FAQs
Is Perfect Russian Buttercream Recipe difficult to make?
Not at all! While it requires some attention to beating and combining, the steps are straightforward, and with a little practice, you’ll be whipping up perfect batches effortlessly.
Can I use salted butter?
It’s best to use unsalted butter so you can control the sweetness and salt balance perfectly. Salted butter might alter the final taste slightly.
How long does Russian buttercream last at room temperature?
Because it contains egg whites and butter, it’s safest to keep it refrigerated if not serving immediately. At room temperature, enjoy within a couple of hours for best flavor and safety.
Can I add food coloring to the buttercream?
Absolutely! Gel or paste food coloring works best to keep the buttercream’s consistency intact while achieving vibrant colors.
Is the Perfect Russian Buttercream Recipe suitable for cakes only?
No way! This buttercream is incredibly versatile and pairs beautifully with cupcakes, cookies, blondies, and even as a filling for layered desserts.
Final Thoughts
There is something truly magical about the Perfect Russian Buttercream Recipe that makes every bite feel special. Its luscious texture and rich flavor make it a go-to frosting that will impress friends and family alike. Don’t hesitate to dive in and try this recipe—it’s the secret ingredient your baked creations have been waiting for!
Print
Perfect Russian Buttercream Recipe
- Prep Time: 10 minutes
- Cook Time: 25 minutes
- Total Time: 35 minutes
- Yield: 9 servings
- Category: Dessert
- Method: Baking
- Cuisine: American
Description
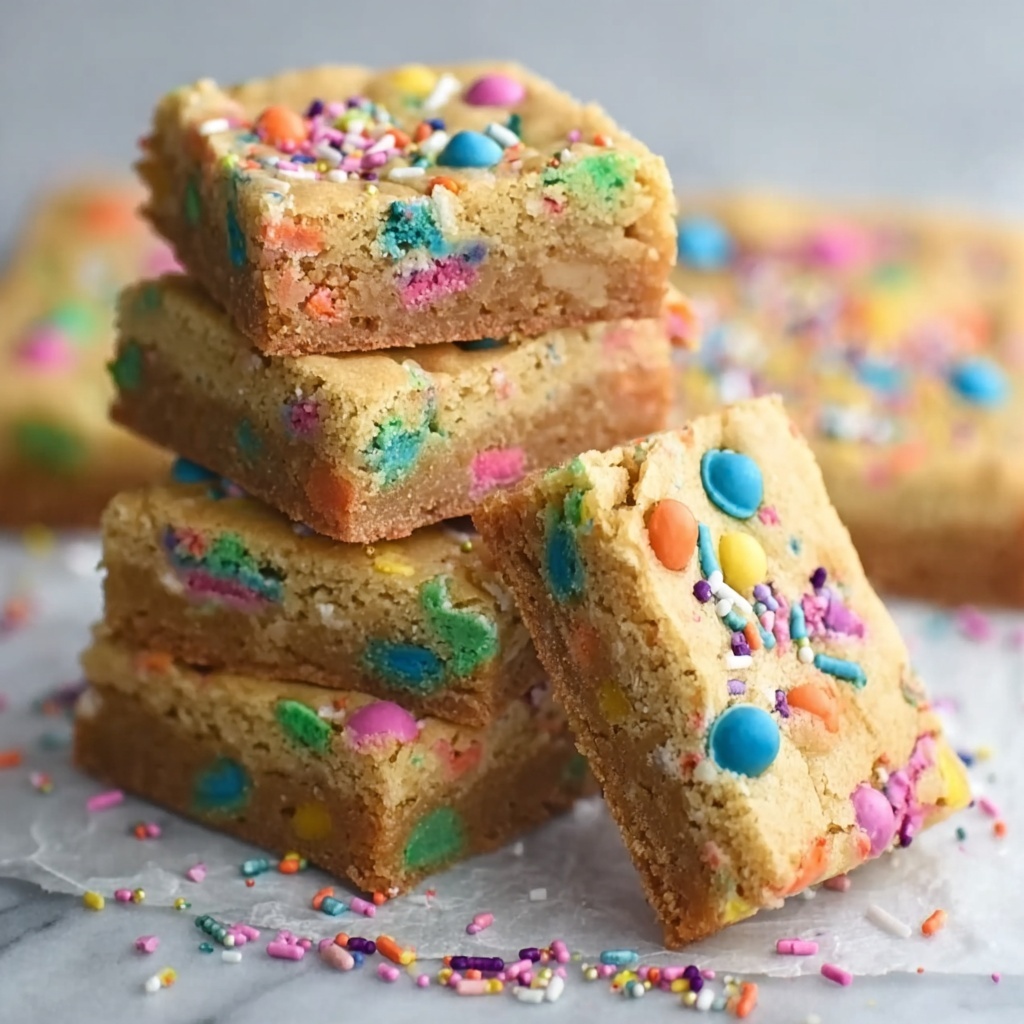
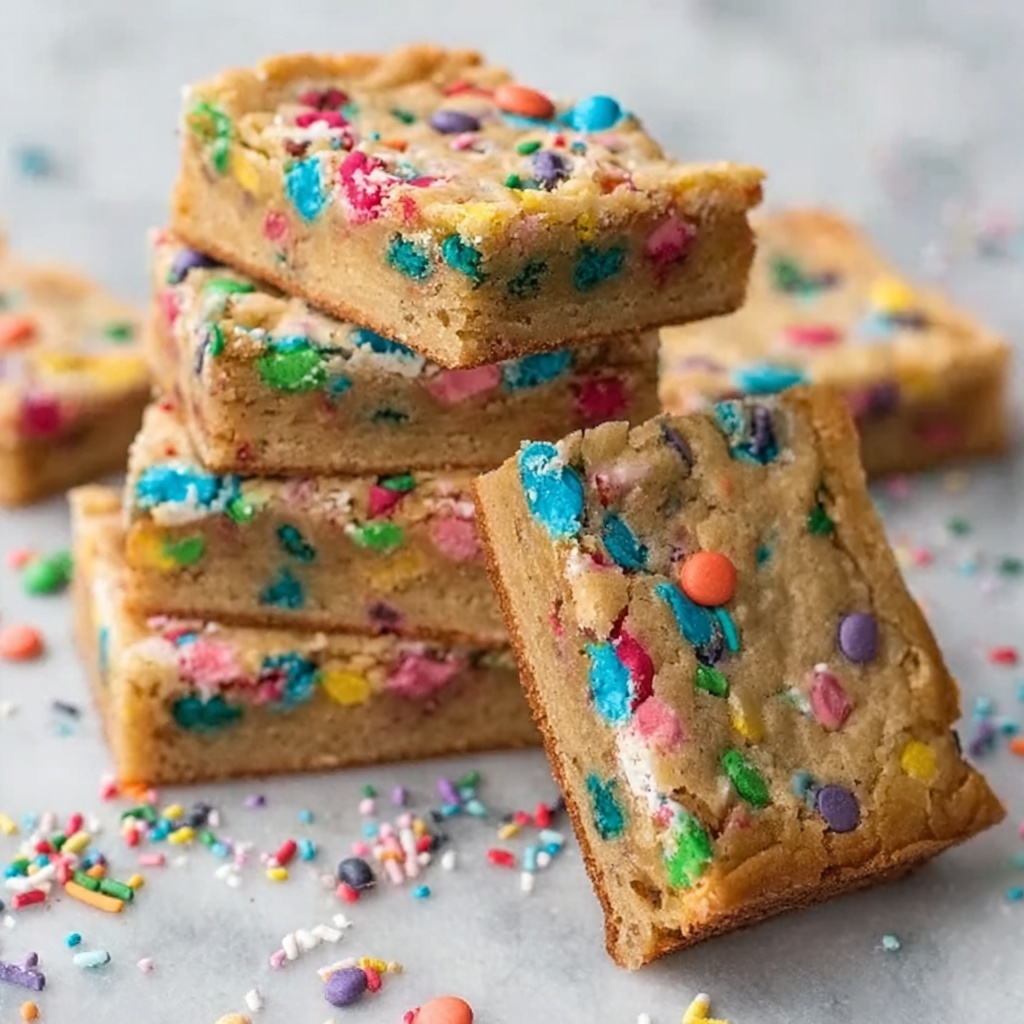
These Funfetti Blondies are a delightful twist on classic blondies, bursting with colorful sprinkles and a rich, buttery flavor. With a soft, chewy texture and a sweet vanilla undertone, they are perfect for celebrations, parties, or a fun everyday treat. Quick to prepare and baked to golden perfection, these blondies will brighten up any dessert table.
Ingredients
Wet Ingredients
- 1 cup unsalted butter, melted
- 1 1/2 cups brown sugar, packed
- 2 large eggs
- 1 tsp vanilla extract
Dry Ingredients
- 2 cups all-purpose flour
- 1 tsp baking powder
- 1/2 tsp salt
Add-ins
- 1/2 cup sprinkles
Instructions
- Preheat and Prepare Pan: Preheat your oven to 350°F (175°C) and grease a 9×9-inch baking pan to ensure the blondies won’t stick.
- Mix Wet Ingredients: In a mixing bowl, whisk together the melted butter and packed brown sugar until the mixture is smooth and fully combined for a creamy base.
- Add Eggs and Vanilla: Add the eggs and vanilla extract to the butter-sugar mixture, whisking thoroughly until the batter is smooth and homogeneous.
- Combine Dry Ingredients: In a separate bowl, whisk together the all-purpose flour, baking powder, and salt to evenly distribute the leavening agent and salt.
- Incorporate Dry into Wet: Gradually add the dry ingredients into the wet ingredients, gently mixing just until combined to avoid overworking the batter which could toughen the blondies.
- Fold in Sprinkles: Carefully fold in the sprinkles to evenly distribute the colors throughout the batter without melting them.
- Pour Batter into Pan: Pour the finished batter into the prepared baking pan and spread it evenly with a spatula for uniform baking.
- Bake: Bake in the preheated oven for 20-25 minutes, or until a toothpick inserted in the center comes out with moist crumbs, indicating a soft, chewy texture.
- Cool and Serve: Remove the blondies from the oven and allow them to cool completely in the pan before cutting into nine squares to ensure clean slices.
Notes
- Do not overmix the batter once the dry ingredients are added to maintain a tender texture.
- Use good quality sprinkles designed for baking to prevent colors from bleeding into the batter.
- If you prefer fudgier blondies, err on the shorter bake time and check for moist crumbs carefully.
- Store blondies in an airtight container at room temperature for up to 3 days or refrigerate for up to a week.
- For an extra touch, drizzle melted white chocolate over cooled blondies before serving.

