
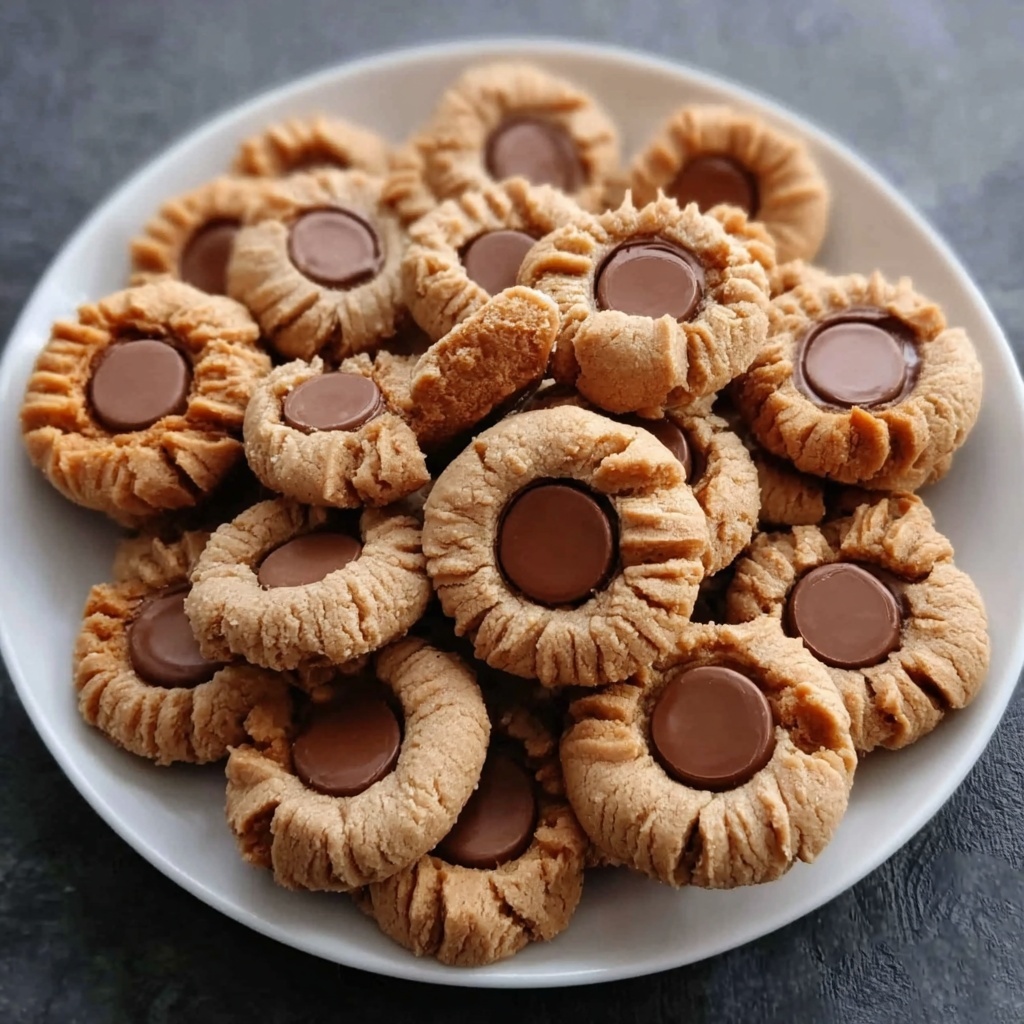
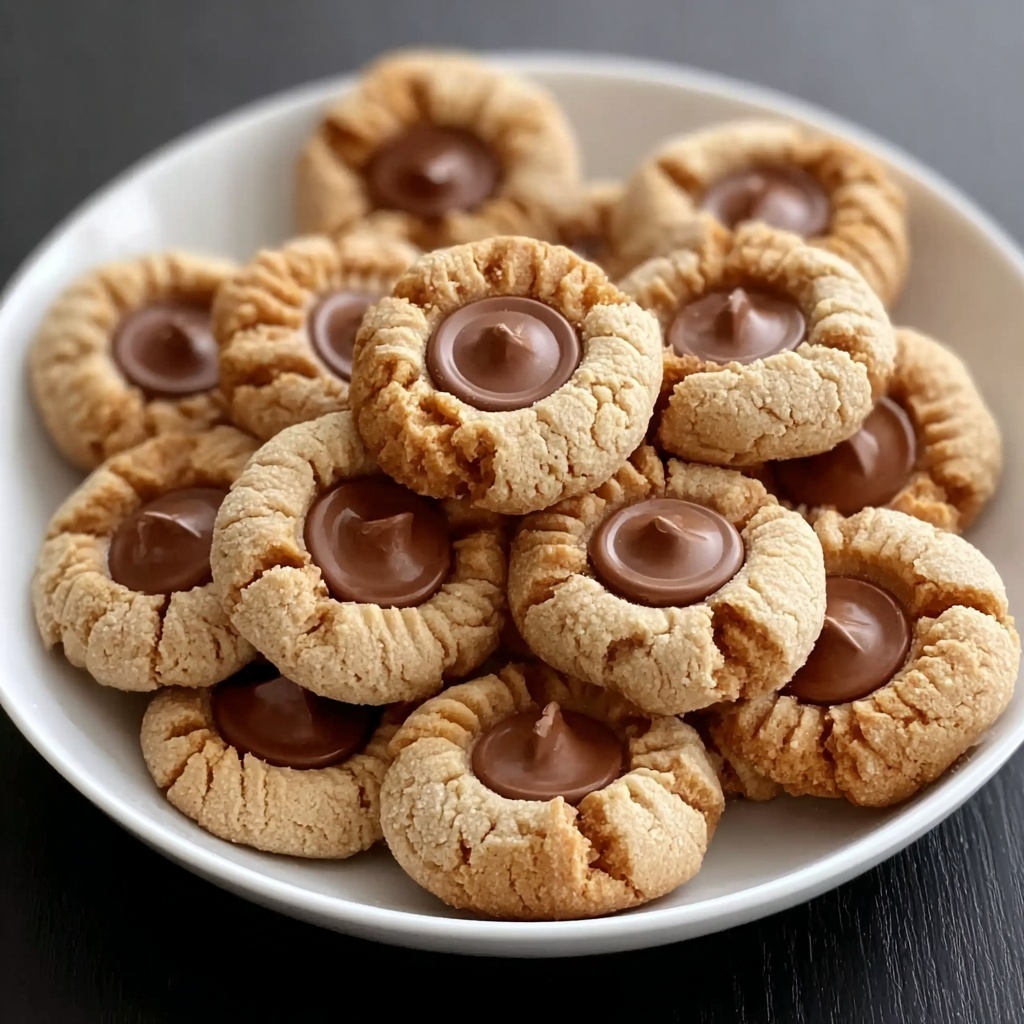
If you adore the irresistible combination of peanut butter and chocolate in a cozy, bite-sized treat, you are going to fall head over heels for this Peanut Butter Cup Cookies Recipe. These cookies deliver a perfect balance of soft, chewy dough infused with creamy peanut butter and an indulgent surprise of a melted mini chocolate peanut butter cup right in the center. Whether you’re baking for a crowd or just treating yourself, this recipe is a guaranteed crowd-pleaser that’s easy to whip up and impossible to resist.
Ingredients You’ll Need
The magic of this Peanut Butter Cup Cookies Recipe lies in its simple pantry staples, each carefully chosen to bring out rich flavors and the perfect texture. From the fluffy butter mixture to the soft dough and that melt-in-your-mouth peanut butter cup, every ingredient plays a vital role.
- All-purpose flour (1 1/4 cups): Provides the essential structure for your cookies.
- Baking soda (1/2 teaspoon): Helps your cookies rise slightly for a light, tender texture.
- Salt (1/4 teaspoon): Enhances and balances the sweetness.
- Unsalted butter, room temperature (1/2 cup): Adds richness and moisture to the cookies.
- Granulated sugar (1/2 cup): Sweetens while contributing to a slight crispness on the edges.
- Creamy peanut butter, no-stir variety (1/2 cup): Delivers that iconic peanut butter flavor and smooth texture.
- Light brown sugar (1/4 cup): Brings caramel undertones and helps keep the cookies soft.
- Large egg, room temperature (1): Binds the dough and adds moisture.
- Pure vanilla extract (1 teaspoon): Amplifies all other flavors with a warm, fragrant note.
- Milk (1 tablespoon): Helps achieve a tender dough consistency.
- Mini chocolate peanut butter cups, unwrapped and frozen (40): The crowd-pleasing surprise nestled inside each cookie.
How to Make Peanut Butter Cup Cookies Recipe
Step 1: Prep Your Oven and Dry Ingredients
Start by preheating your oven to 375°F and greasing a mini muffin pan so your cookies don’t stick and come out perfectly shaped. Then, whisk together the flour, baking soda, and salt in a bowl and set this aside. This little step ensures your dry ingredients are evenly distributed for a uniform dough.
Step 2: Cream Together Butter and Sugars
Next, in your mixer, beat the softened butter, creamy peanut butter, granulated sugar, and brown sugar until the mixture is light and fluffy—around 3 minutes. This process is key because incorporating air here will make your cookies delightfully tender and chewy.
Step 3: Add the Wet Ingredients
Mix in the egg, vanilla extract, and milk until everything is just combined. These ingredients add moisture and depth, helping bring your dough together and ensuring every bite is intensely flavorful.
Step 4: Combine Dry and Wet Ingredients
Slowly add the dry mixture to the wet, mixing just until you have a dough. Don’t over-mix here; you want those cookies to be soft and tender, not tough.
Step 5: Shape and Bake
Scoop about 2 teaspoons of dough and roll each into a ball. Place each dough ball into a prepared mini muffin cup to give them a neat shape as they bake. Bake for exactly 8 minutes—this short baking time keeps them soft but gives them just enough structure.
Step 6: Add the Peanut Butter Cups
Right after the cookies come out of the oven, take your frozen mini chocolate peanut butter cups and press one into the center of each warm cookie. The heat from the cookie will gently melt the edges, creating a gooey, heavenly center that’s impossible to resist.
Step 7: Cool and Enjoy
Allow the cookies to cool completely in the pan before attempting to remove them. This cooling time helps the cookies set just enough so they hold their shape, with a luscious peanut butter cup center waiting inside.
How to Serve Peanut Butter Cup Cookies Recipe
Garnishes
Sprinkle a little flaky sea salt on top of each cookie right after adding the peanut butter cup. The salty crunch heightens the sweetness and peanut butter flavor, creating an elegant twist on this casual treat. You can also drizzle with melted chocolate for an extra touch of decadence.
Side Dishes
Serve these cookies alongside a cold glass of milk or a rich cup of coffee to complement their sweet, nutty flavor. For a party, pair them with fresh berries or a scoop of vanilla ice cream for an indulgent dessert plate everyone will rave over.
Creative Ways to Present
Arrange your Peanut Butter Cup Cookies Recipe on a decorative platter, nestling each cookie in mini cupcake liners that complement your party theme or kitchen style. You can also stack them on a tiered stand for a charming display that invites guests to grab and go. For gifts, package a batch with parchment paper and ribbon — these treats make a heartfelt homemade present.
Make Ahead and Storage
Storing Leftovers
Room temperature storage in an airtight container keeps these cookies fresh for up to 3 days. Make sure they’re completely cooled before storing so they maintain their texture and don’t become soggy.
Freezing
If you want to enjoy these treats later, freeze the baked cookies in a single layer on a baking sheet first. Once solid, transfer them to a freezer bag or container. They can stay frozen for up to 3 months, making it easy to have a sweet snack on hand whenever the craving strikes.
Reheating
To revive the soft texture and melty peanut butter cup center, warm the cookies in a microwave for about 10-15 seconds or in a 300°F oven for 5 minutes. This quick heat-up makes them taste fresh-baked and just as delightful as day one.
FAQs
Can I use crunchy peanut butter instead of creamy in this Peanut Butter Cup Cookies Recipe?
Absolutely! Crunchy peanut butter adds a lovely texture contrast but keep in mind it might change the softness of your cookies slightly. Both versions taste delicious, so choose based on your preference.
Why do I freeze the mini peanut butter cups before pressing them into the cookies?
Freezing keeps the peanut butter cups firm so they don’t completely melt when pressed into the warm cookies, allowing them to soften perfectly without losing their shape.
Can I make these cookies without a mini muffin pan?
You can bake these cookies on a regular baking sheet, shaping the dough into small balls. However, the mini muffin pan helps maintain a consistent shape and size, which is ideal for holding the peanut butter cup center nicely.
What if I don’t have mini peanut butter cups? Can I use regular-sized ones?
Regular-sized peanut butter cups can be used, but you might want to cut them into smaller pieces so they fit within the cookie dough and bake evenly.
Can I double this Peanut Butter Cup Cookies Recipe for a larger batch?
Definitely! This recipe scales well, just be sure to have enough mini muffin pans or bake in batches, and keep an eye on baking times as they might vary slightly with more dough in the oven.
Final Thoughts
Making this Peanut Butter Cup Cookies Recipe is like giving yourself a warm, delicious hug. With just a handful of ingredients and straightforward steps, you create something truly special—cookies that bring joy in every bite. I can’t wait for you to try them and share the love with friends and family because these are the kind of treats that turn everyday moments into celebrations.
Print
Peanut Butter Cup Cookies Recipe
- Prep Time: 10 minutes
- Cook Time: 8 minutes
- Total Time: 18 minutes
- Yield: 40 mini cookies
- Category: Dessert
- Method: Baking
- Cuisine: American
Description
These Peanut Butter Cup Cookies are a delightful treat combining rich peanut butter flavor with the indulgence of mini chocolate peanut butter cups. Soft, chewy cookies baked in mini muffin pans make for perfect bite-sized desserts, ideal for parties or everyday snacking.
Ingredients
Dry Ingredients
- 1 1/4 cups all-purpose flour
- 1/2 teaspoon baking soda
- 1/4 teaspoon salt
Wet Ingredients
- 1/2 cup unsalted butter, room temperature
- 1/2 cup granulated sugar
- 1/2 cup creamy peanut butter (no-stir variety)
- 1/4 cup light brown sugar
- 1 large egg, room temperature
- 1 teaspoon pure vanilla extract
- 1 tablespoon milk
Topping
- 40 mini chocolate peanut butter cups, unwrapped and frozen
Instructions
- Preheat and Prepare Pan: Preheat your oven to 375°F (190°C) and grease a mini muffin pan to prevent sticking.
- Mix Dry Ingredients: In a bowl, whisk together the all-purpose flour, baking soda, and salt until evenly combined; set aside.
- Cream Butter and Sugars: Using a mixer, beat the unsalted butter, creamy peanut butter, granulated sugar, and light brown sugar together until the mixture is light and fluffy, which takes about 3 minutes.
- Add Wet Ingredients: Incorporate the egg, vanilla extract, and milk into the butter mixture, mixing until just combined.
- Combine Dry and Wet Mixtures: Gradually add the dry ingredient mixture to the wet ingredients, mixing gently until just combined to avoid overworking the dough.
- Form Dough Balls: Scoop about 2 teaspoons of dough, roll each into balls, and place one in each cavity of the prepared mini muffin pan.
- Bake: Bake in the preheated oven for 8 minutes until the cookies are set but still soft.
- Add Topping: Immediately press a frozen mini chocolate peanut butter cup into the center of each warm cookie so it slightly melts into the dough.
- Cool: Allow the cookies to cool completely in the pan before removing to maintain their shape and texture.
Notes
- Using frozen peanut butter cups helps maintain their shape and creates a perfect gooey center.
- Ensure butter and egg are at room temperature for better mixing and texture.
- Do not overmix once dry ingredients are added to prevent tough cookies.
- Greasing the mini muffin pan thoroughly prevents cookies from sticking.
- These cookies freeze well; store in an airtight container.

