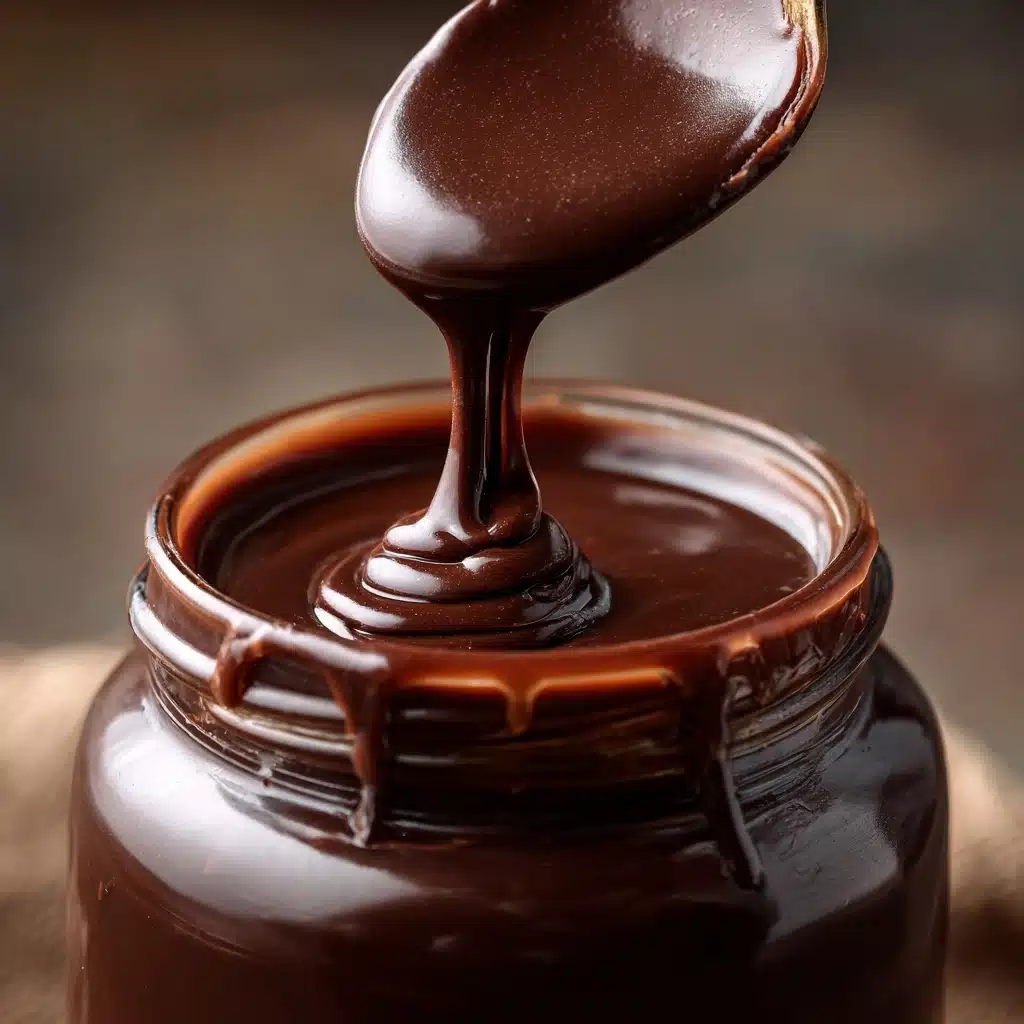
Homemade Chocolate Syrup Recipe
If you’ve ever drizzled a decadent, glossy chocolate syrup over your ice cream or swirled it into a cold glass of milk, you know there’s nothing quite as satisfying. Making Homemade Chocolate Syrup from scratch in your own kitchen is pure magic: five pantry staples transform into a rich, versatile sauce that instantly elevates desserts and drinks. Trust me, once you’ve tasted the pure chocolate flavor and silky texture of Homemade Chocolate Syrup, you’ll never want to go back to the store-bought version.
Ingredients You’ll Need
It always amazes me how just a handful of simple ingredients can become something so indulgent. Each element plays a starring role in the flavor, texture, and irresistible sheen of this Homemade Chocolate Syrup—don’t skimp or substitute, if you can help it.
- Unsweetened cocoa powder: The heart of the syrup, gives it that deep, genuine chocolate taste as well as its beautiful color. For even more depth, Dutch-processed cocoa is a luscious upgrade.
- Granulated sugar: Sweetens the chocolate and balances the cocoa’s natural bitterness, ensuring each drizzle is perfectly smooth on your palate.
- Water: Helps dissolve the sugar and cocoa powder, creating that luxurious pourable texture we all love in chocolate syrup.
- Salt: Just a pinch truly makes a difference, pulling all the flavors together and amplifying the chocolateiness.
- Vanilla extract: Swirling this in at the end adds an aromatic, finishing touch and rounds out the bittersweet notes.
How to Make Homemade Chocolate Syrup
Step 1: Combine Your Dry Ingredients
Start with a medium saucepan set over no heat just yet. Whisk together the cocoa powder, granulated sugar, and salt until they’re evenly combined. Blending these first ensures a smooth syrup with no lumpy surprises. This step is key for making sure every bit of chocolate and sugar dissolves perfectly later on.
Step 2: Add Water and Whisk Smooth
Pour in the water and whisk continuously. The mixture might look a little grainy at first, but keep going! Soon you’ll have a glossy, thick cocoa mixture that promises the perfect syrupy consistency. Don’t rush this part—getting it smooth now makes all the difference later.
Step 3: Bring the Mixture to a Boil
Turn the heat up to medium and keep whisking as the mixture heats. It’ll come to a gentle boil, and you’ll notice it start to look even more luscious. This is when the flavors truly start to meld and the syrup begins to thicken just slightly, so don’t walk away!
Step 4: Simmer to Perfection
Reduce the heat and let your syrup simmer for 3 to 4 minutes, whisking all the while. If you love your syrup ultra-thick, let it simmer a few extra minutes. This short simmering time creates that iconic glossy finish and perfect drizzle-worthy consistency. Be careful not to overcook, as it will continue to thicken as it cools.
Step 5: Add Vanilla and Cool
Once you’ve reached the texture you like, remove the pan from the heat and whisk in the vanilla extract. Let your Homemade Chocolate Syrup cool completely before pouring it into a jar or bottle. It’s hard to wait, but the flavors develop as it cools—and the syrup will set up to pour like a dream.
How to Serve Homemade Chocolate Syrup

Garnishes
A swirl of whipped cream, a sprinkle of cacao nibs, or even a few fresh berries turns each generous pour of syrup into a special event. For extra flair, add a pinch of flaky sea salt or some toasted nuts before serving—these little touches make Homemade Chocolate Syrup truly memorable.
Side Dishes
This syrup is heavenly over classic vanilla ice cream, but don’t stop there! Use it to dress up pancakes, waffles, or French toast. Stir it into your morning oatmeal for a chocolatey twist or drizzle over pound cake for instant dessert magic. The possibilities are deliciously endless.
Creative Ways to Present
Transform the everyday into a celebration: layer it in parfaits, dip fresh fruit, or make chocolaty milk for a nostalgic treat. If you’re entertaining, set up a DIY ice cream sundae bar with your Homemade Chocolate Syrup as the star, complete with a variety of toppings for everyone to customize their own sweet masterpiece.
Make Ahead and Storage
Storing Leftovers
Once your syrup cools, pour it into a clean glass jar or bottle and pop it in the fridge. It’ll stay fresh for up to three weeks, ready for chocolate emergencies or everyday cravings. Give it a good shake or stir before pouring, since a little separation is totally normal.
Freezing
If you want to make a big batch for future use, Homemade Chocolate Syrup freezes beautifully. Pour it into freezer-safe containers, leaving some space for expansion. Thaw in the refrigerator overnight and give it a quick stir—no flavor gets lost along the way.
Reheating
Prefer your chocolate syrup warm and pourable? Simply warm the amount you need in the microwave for a few seconds or heat gently on the stovetop. Just don’t let it boil, or the texture can become too thick. Stir well and enjoy over anything that’s calling for a touch of chocolate comfort!
FAQs
Can I use a sugar substitute in Homemade Chocolate Syrup?
Absolutely! While granulated sugar gives the classic texture and taste, you can experiment with substitutes like coconut sugar or erythritol. Just know the consistency and flavor may change a bit, so adjust the simmering time if needed.
Is this recipe suitable for vegan and gluten-free diets?
Yes! Homemade Chocolate Syrup is naturally vegan, dairy-free, and gluten-free, provided you use pure cocoa powder and double-check your vanilla extract. It’s a wonderful option for many dietary needs.
How can I make my chocolate syrup thicker?
For a thicker syrup, simply simmer it for an extra 2 to 3 minutes during the cooking process. Keep in mind, the syrup thickens more as it cools, so check the texture after it rests in the fridge before returning it to the heat.
What type Condiment
You can use any unsweetened cocoa powder, but Dutch-processed cocoa delivers an especially rich, smooth chocolate flavor and deep color. Whichever you choose, make sure it’s unsweetened for the best results.
Can I double or halve the recipe?
Definitely! Homemade Chocolate Syrup is easy to scale up or down. Just keep an eye on the simmering time—larger batches may take a minute or two longer to thicken, while smaller ones are done in a snap.
Final Thoughts
Once you try this quick and rewarding recipe, you’ll understand why Homemade Chocolate Syrup is a must-have in any kitchen. It’s such an easy way to add a little luxury to everyday treats, and it just might become your new secret ingredient for desserts and drinks. Give it a go and see for yourself—your chocolate-loving heart will thank you!
Print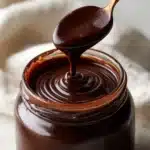
Homemade Chocolate Syrup Recipe
- Total Time: 15 minutes
- Yield: 2 cups 1x
- Diet: Vegan
Description
Indulge in the rich, velvety goodness of Homemade Chocolate Syrup with this easy-to-follow recipe. Perfect for drizzling over ice cream, mixing with milk, or adding to desserts, this versatile syrup will elevate your sweet treats to a whole new level.
Ingredients
For the Chocolate Syrup:
- 1 cup unsweetened cocoa powder
- 1 1/2 cups granulated sugar
- 1 cup water
- 1/8 teaspoon salt
- 1 teaspoon vanilla extract
Instructions
- Prepare the Chocolate Syrup Mixture: In a medium saucepan, whisk together cocoa powder, sugar, salt, and water until smooth.
- Boil the Mixture: Place over medium heat and bring to a gentle boil, whisking constantly.
- Simmer: Reduce heat and simmer for 3 to 4 minutes until the mixture thickens slightly.
- Add Vanilla: Remove from heat and stir in vanilla extract.
- Cool and Store: Let cool completely before transferring to a glass jar or bottle. Store in the refrigerator for up to 3 weeks. Shake or stir before using.
Notes
- For a richer flavor, use Dutch-processed cocoa.
- If you prefer a thicker syrup, simmer an extra 2 to 3 minutes.
- This syrup works well in milk, coffee, desserts, or as an ice cream topping.
- Prep Time: 5 minutes
- Cook Time: 10 minutes
- Category: Condiment
- Method: Stovetop
- Cuisine: American
Nutrition
- Serving Size: 2 tablespoons
- Calories: 95
- Sugar: 22 g
- Sodium: 15 mg
- Fat: 0 g
- Saturated Fat: 0 g
- Unsaturated Fat: 0 g
- Trans Fat: 0 g
- Carbohydrates: 24 g
- Fiber: 1 g
- Protein: 1 g
- Cholesterol: 0 mg


