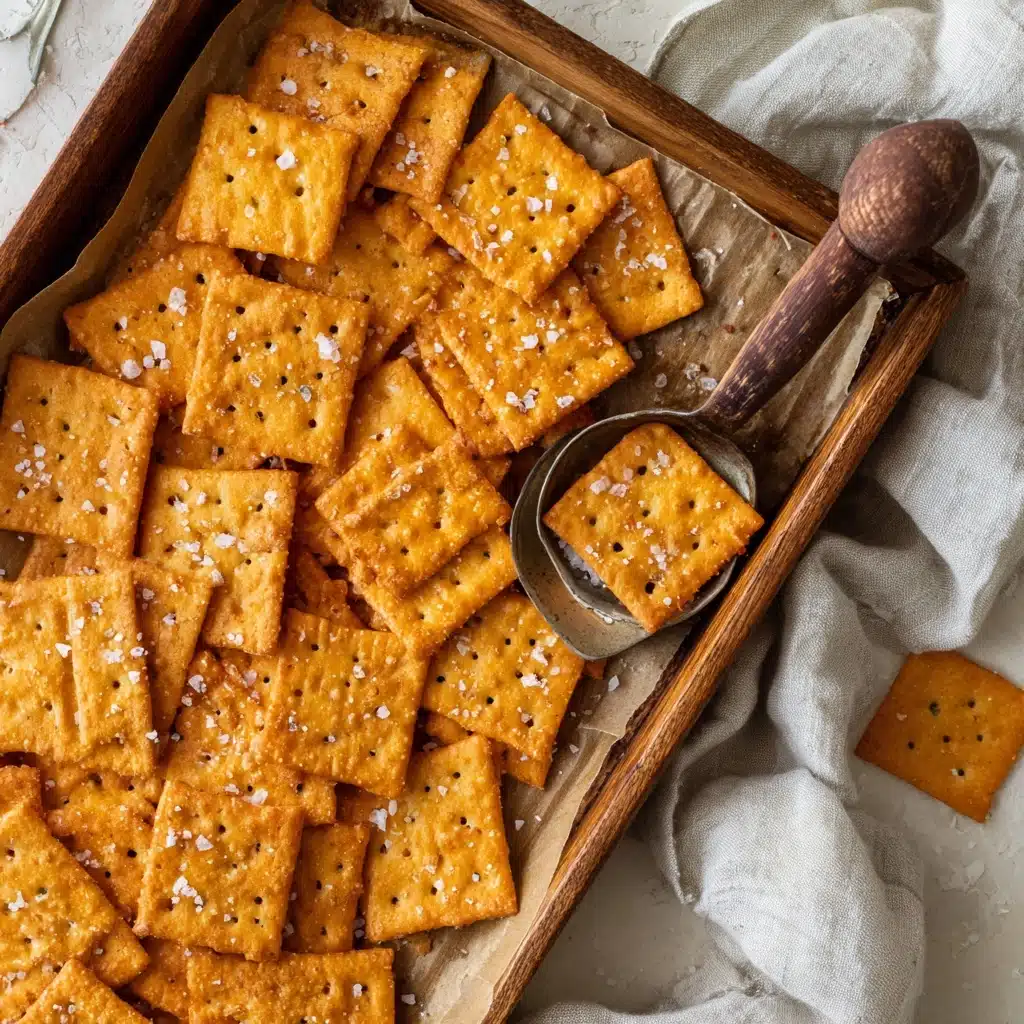
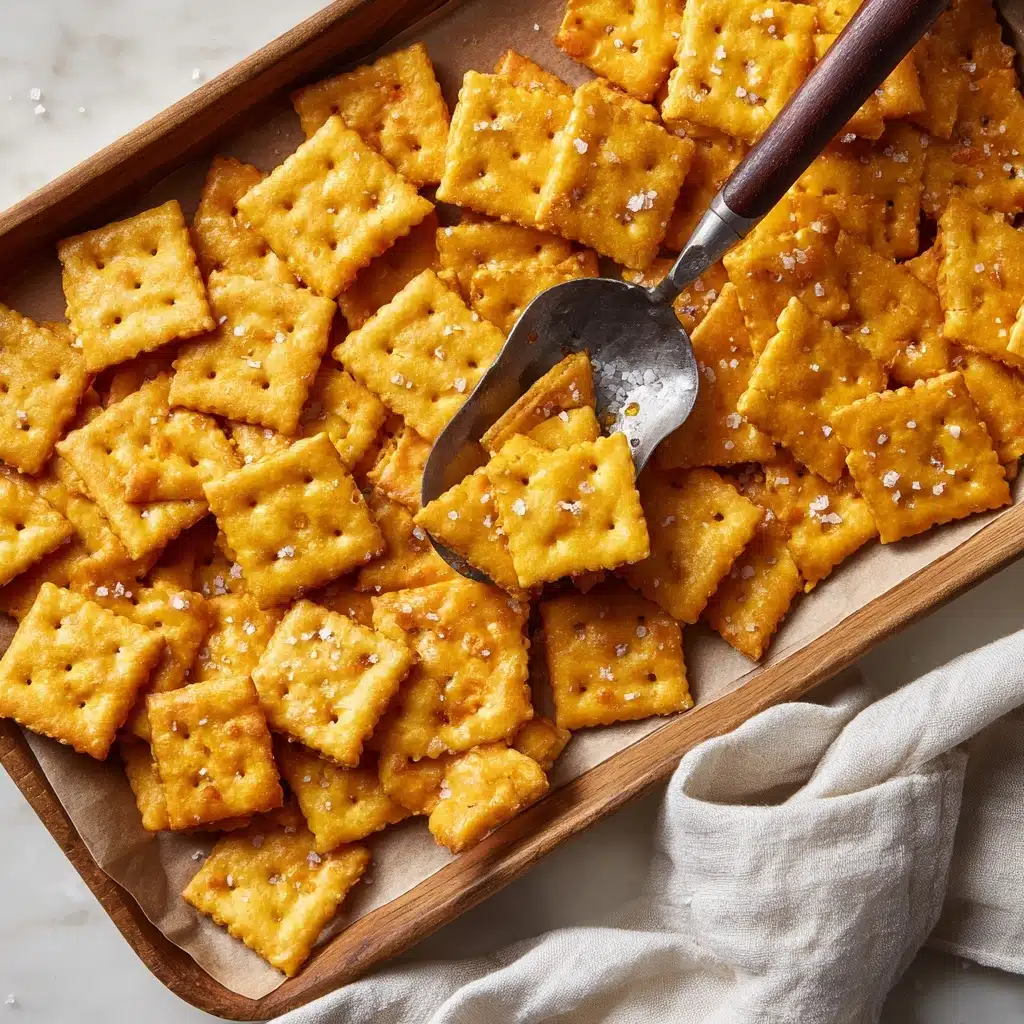
Homemade Cheez-Its Recipe
There’s nothing quite like biting into a handful of Homemade Cheez-Its—crisp, buttery, and bursting with real cheddar flavor. These golden squares are so addictive, you’ll wonder why you ever settled for the boxed version! Making your own means you get that classic cheesy crunch with wholesome ingredients and a customizable touch. Whether you’re looking for an after-school snack, a party treat, or a nostalgic nibble, this recipe brings the joy of Homemade Cheez-Its right to your kitchen.
Ingredients You’ll Need
The beauty of Homemade Cheez-Its is how they transform simple, everyday ingredients into an irresistible snack. Each component plays an important role in taste and texture, so don’t be tempted to skip or substitute—your crackers will thank you!
- Sharp Cheddar Cheese (8 ounces, shredded): Delivers that signature tangy, bold flavor and gorgeous orange hue.
- Unsalted Butter (4 tablespoons, softened): Adds richness and creates that melt-in-your-mouth crunch.
- Salt (1 teaspoon): Enhances all the cheesy goodness and balances the flavors.
- All-Purpose Flour (1 cup): Provides the structure and classic cracker snap.
- Ice Water (2 tablespoons): Brings the dough together without making it sticky or tough.
- Coarse Salt (for sprinkling): Gives each cracker that irresistible, salty finish on top.
How to Make Homemade Cheez-Its
Step 1: Pulse the Cheese, Butter, and Salt
Start by tossing your shredded sharp cheddar, softened butter, and salt into a food processor. Pulse until the mixture looks crumbly and almost sandy. This step ensures the fat is evenly distributed, which is the key to that perfectly tender, crisp texture in every bite.
Step 2: Add the Flour
Sprinkle the all-purpose flour over the crumbly cheese mixture and pulse a few more times. You want everything to be well combined, but don’t over-mix—just enough so the flour is evenly incorporated and the mixture still looks a bit dry.
Step 3: Bring the Dough Together
With the processor running, drizzle in ice water, one tablespoon at a time. You’ll see the dough start to clump—you want it to just hold together when pinched. Usually, two tablespoons does the trick, but if it’s still a bit dry, add a splash more.
Step 4: Chill the Dough
Shape the dough into a flat disk, wrap it snugly in plastic wrap, and pop it in the fridge for 30 minutes. Chilling helps the dough firm up, making it easier to roll out and cut into those signature squares later.
Step 5: Roll and Cut
Once chilled, roll the dough out on a lightly floured surface to about 1/8-inch thickness. Use a pastry cutter or sharp knife to slice into 1-inch squares—don’t worry about perfection, rustic edges just add charm! Arrange the squares on parchment-lined baking sheets.
Step 6: Add the Classic Cheez-It Touch
To get that iconic look, poke a small hole in the center of each square with a skewer or toothpick. Sprinkle a pinch of coarse salt over the top. This not only looks authentic, it adds a satisfying salty crunch.
Step 7: Bake Until Golden and Crisp
Bake at 375°F (190°C) for 12 to 15 minutes, or until the crackers are golden and crisp around the edges. Keep an eye on them—ovens vary, and the difference between perfect and overdone can be just a minute! Let them cool completely to finish crisping up.
How to Serve Homemade Cheez-Its
Garnishes
A sprinkle of fresh cracked black pepper, a dusting of smoked paprika, or a pinch of dried herbs can take your Homemade Cheez-Its from classic to gourmet. If you want to customize, try brushing with melted butter and a little garlic powder as soon as they come out of the oven.
Side Dishes
These crackers are the ultimate companion to creamy tomato soup, a hearty chili, or even a fresh summer salad. They also make a fabulous addition to cheese boards, paired with fruit, nuts, and a selection of dips like hummus or spinach-artichoke spread.
Creative Ways to Present
Pile your Homemade Cheez-Its high in a mason jar tied with ribbon for a charming hostess gift, or serve them in a rustic basket lined with parchment at your next backyard gathering. For parties, arrange them in little paper cones or snack cups for easy, mess-free munching.
Make Ahead and Storage
Storing Leftovers
Keep any leftover Homemade Cheez-Its in an airtight container at room temperature for up to a week. They stay crisp best if you let them cool completely before storing—any trapped warmth can make them lose their crunch.
Freezing
If you’d like to make a big batch, you can freeze the unbaked dough disk tightly wrapped for up to two months. Thaw overnight in the fridge, then proceed with rolling, cutting, and baking as usual. Baked crackers can also be frozen in a sealed bag; re-crisp in the oven before serving.
Reheating
To revive any Homemade Cheez-Its that have softened, simply pop them on a baking sheet in a 300°F (150°C) oven for about 5 minutes. Let them cool before snacking—they’ll be as crunchy as the day they were made!
FAQs
Can I use a different type Snack
Absolutely! While sharp cheddar gives the most classic flavor, you can experiment with pepper jack, gouda, or a blend of cheeses for a twist. Just make sure the cheese is well-shredded and not too moist.
Do I need a food processor to make Homemade Cheez-Its?
A food processor makes things quick and easy, but you can also use a pastry cutter or even your fingers to work the butter and cheese into the flour. Just be sure to keep everything cold for the best texture.
How do I make my crackers extra crispy?
Roll your dough as evenly and thinly as possible, and don’t overcrowd the baking sheet. If you like them super crisp, bake a minute or two longer—but watch closely to avoid burning.
Can I make Homemade Cheez-Its gluten-free?
Yes! Swap the all-purpose flour with your favorite gluten-free flour blend. The crackers may be a little more delicate, but the cheesy flavor will still shine through.
What’s the best way to get that classic Cheez-It shape?
A pastry wheel or sharp knife works perfectly for cutting squares, but don’t stress about exact size. The signature center hole, made with a skewer or toothpick, is what really gives them that iconic Homemade Cheez-Its look.
Final Thoughts
Once you taste the real deal, you’ll never look at a store-bought cracker the same way again! Give these Homemade Cheez-Its a try and watch them disappear—whether you’re sharing with friends or keeping them all to yourself. Happy snacking!
Print
Homemade Cheez-Its Recipe
- Total Time: 35 minutes (plus chilling time)
- Yield: 8 servings (about 80 crackers) 1x
- Diet: Vegetarian
Description
Homemade Cheez-Its are crispy, cheesy crackers made with sharp cheddar cheese and a buttery dough. This easy recipe lets you create a classic savory snack that’s perfect for parties, lunchboxes, or anytime you crave a cheesy crunch. Made from simple ingredients and baked to golden perfection, these crackers capture the authentic flavor of the beloved store-bought version with a homemade touch.
Ingredients
Cheese Mixture
- 8 ounces sharp cheddar cheese, shredded
- 4 tablespoons unsalted butter, softened
- 1 teaspoon salt
Dough
- 1 cup all-purpose flour
- 2 tablespoons ice water
- Coarse salt for sprinkling
Instructions
- Combine Cheese and Butter: In a food processor, combine the shredded sharp cheddar cheese, softened unsalted butter, and salt. Pulse until the mixture becomes crumbly and well blended, ensuring the cheese is evenly incorporated with the butter.
- Add Flour: Add the all-purpose flour to the cheese mixture in the processor. Pulse several times until the flour is completely mixed and the texture resembles coarse crumbs.
- Incorporate Ice Water: Slowly add the ice water, one tablespoon at a time, pulsing after each addition. Continue until the dough just starts to come together and holds when pressed. Avoid adding too much water to keep the dough from becoming sticky.
- Chill the Dough: Gather the dough into a disk shape, wrap it tightly in plastic wrap, and refrigerate for 30 minutes. This helps the dough firm up and makes it easier to roll out.
- Preheat the Oven: Preheat your oven to 375°F (190°C) and line two baking sheets with parchment paper to prevent sticking and ensure even baking.
- Roll Out Dough: On a lightly floured surface, roll out the chilled dough to approximately 1/8-inch thickness. Try to keep the thickness consistent for even baking.
- Cut into Squares: Using a pastry cutter or sharp knife, cut the dough into 1-inch squares. Transfer the squares to the prepared baking sheets, spacing them slightly apart.
- Create Center Holes: Use a skewer or toothpick to poke a small hole in the center of each square to mimic the classic Cheez-It appearance and help them bake evenly.
- Sprinkle with Coarse Salt: Lightly sprinkle coarse salt on top of each cracker for extra flavor and crunch.
- Bake: Bake in the preheated oven for 12 to 15 minutes, or until the crackers are golden and crisp. Keep an eye on them to prevent burning.
- Cool and Serve: Allow the crackers to cool completely on a wire rack before serving or storing. Cooling makes them crispier and ready to enjoy.
Notes
- For a spicy kick, add 1/4 teaspoon cayenne pepper or smoked paprika to the dough before processing.
- Store baked crackers in an airtight container at room temperature for up to 1 week to maintain freshness and crispness.
- Prep Time: 20 minutes (plus 30 minutes chilling time)
- Cook Time: 15 minutes
- Category: Snack
- Method: Baking
- Cuisine: American
Nutrition
- Serving Size: about 10 crackers
- Calories: 150
- Sugar: 0 g
- Sodium: 210 mg
- Fat: 9 g
- Saturated Fat: 5 g
- Unsaturated Fat: 3 g
- Trans Fat: 0 g
- Carbohydrates: 12 g
- Fiber: 0 g
- Protein: 4 g
- Cholesterol: 20 mg


