Banana Sushi Recipe
Say hello to your new favorite snack: the Banana Sushi Recipe! This whimsical treat is as fun to make as it is to eat, blending creamy peanut butter, luscious Nutella, and a playful mix of crunchy toppings wrapped around sweet, ripe bananas. It’s an absolute superstar for lunchboxes, party platters, or late-night cravings—plus, it comes together in just minutes with pantry staples. Whether you’re looking for a kid-friendly snack or a no-bake dessert that feels just a little bit fancy, this Banana Sushi Recipe will win hearts with every bite.
Ingredients You’ll Need
-
Main Ingredients
- 2 ripe bananas, peeled
- 1/4 cup creamy peanut butter
- 1/4 cup Nutella or chocolate hazelnut spread
Toppings
- 1/4 cup granola
- 2 tablespoons shredded coconut
- 2 tablespoons mini chocolate chips
- 2 tablespoons crushed nuts (optional)
- Honey for drizzling (optional)
How to Make Banana Sushi Recipe
Step 1: Prep the Bananas
Start by peeling your bananas and placing them on a cutting board. Make sure to choose bananas that are ripe for sweetness, but still firm enough to hold their shape as you slice and roll them in toppings.
Step 2: Spread the Goodness
Using a butter knife or small spatula, spread a generous layer of creamy peanut butter over one banana and Nutella over the other. Cover the bananas evenly, making sure every side gets coated for maximum flavor and to help the toppings stick.
Step 3: Roll in Toppings
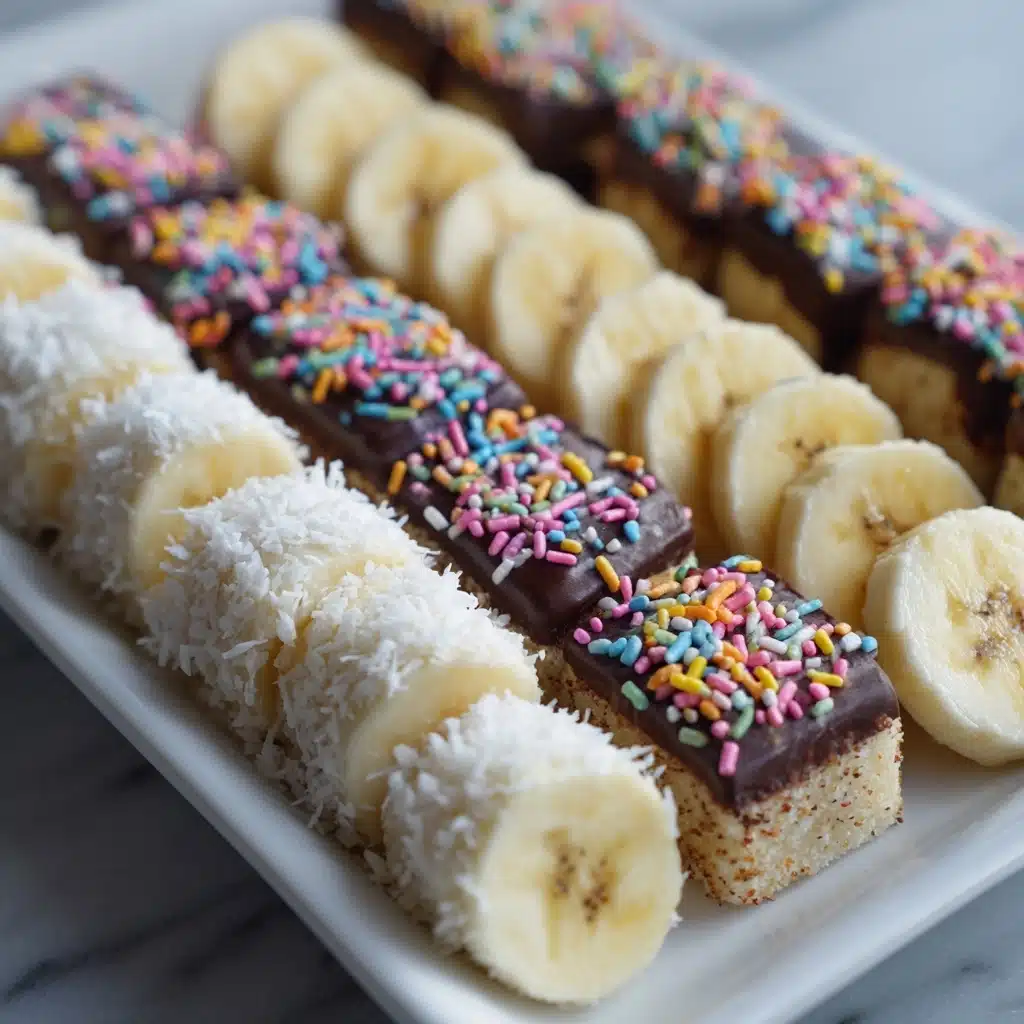
Pour your chosen toppings (granola, shredded coconut, mini chocolate chips, and optional nuts) onto separate plates or a large tray. Gently roll each coated banana in the toppings, pressing lightly so everything adheres. Don’t be afraid to mix and match for fun textures and colors!
Step 4: Slice into Sushi Rounds
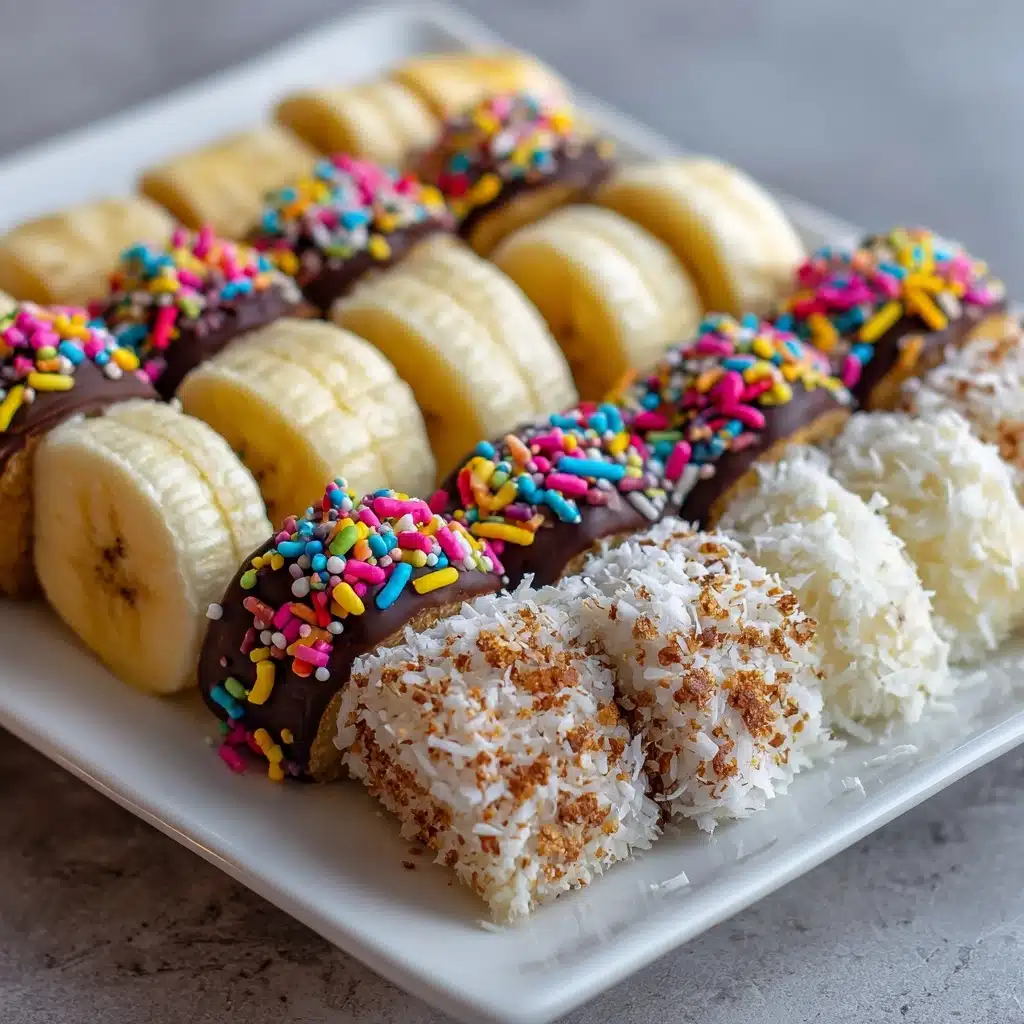
With a sharp knife, carefully slice each banana into bite-sized rounds, about 1/2 inch thick. This is where the sushi magic happens—the cross-sections show off all those gorgeous layers and crunchy bits.
Step 5: Plate and Drizzle
Arrange your banana sushi pieces on a serving plate. If you’d like, give them a light drizzle of honey for extra sweetness and a glossy finish. Serve immediately and watch them disappear!
How to Serve Banana Sushi Recipe
Garnishes
Take your Banana Sushi Recipe presentation up a notch by sprinkling extra shredded coconut, a few chopped nuts, or a dusting of cocoa powder on top. A light honey drizzle adds shine and sweetness, making each piece look irresistible.
Side Dishes
Pair your banana sushi with a bowl of fresh berries, a smoothie, or some Greek yogurt for a more filling snack or light meal. For parties, serve alongside other finger foods like fruit kabobs or mini muffins for a colorful, crowd-pleasing spread.
Creative Ways to Present
You can serve the Banana Sushi Recipe on a wooden board sushi-style with chopsticks for a playful twist, or skewer the rounds on toothpicks for easy party bites. For extra flair, use colorful sprinkles or edible flowers to make your platter pop!
Make Ahead and Storage
Storing Leftovers
If you have leftover banana sushi, store it in an airtight container in the refrigerator for up to 24 hours. Keep in mind the bananas may brown slightly, but a quick spritz of lemon juice before storing helps maintain their color.
Freezing
While the Banana Sushi Recipe tastes best fresh, you can freeze the rounds for up to a month. Arrange them in a single layer on a baking sheet, freeze until solid, then transfer to a freezer-safe bag. Enjoy straight from the freezer for a frosty treat!
Reheating
No reheating necessary—just enjoy your banana sushi cold or at room temperature. If frozen, let the pieces thaw for 5–10 minutes before serving for the best texture and flavor.
FAQs
Can I make the Banana Sushi Recipe nut-free?
Absolutely! Swap the peanut butter and Nutella for sunflower seed butter or cookie butter, and skip the nuts in the toppings to make this snack safe for nut allergies.
How do I keep the bananas from turning brown?
To help prevent browning, lightly brush the banana rounds with lemon juice before assembling or storing. Serve as soon as possible for the freshest look and taste.
What kind of granola works best?
Choose a granola that’s chunky and not too powdery so it sticks well to the banana. Flavors like honey oat, chocolate, or coconut pair perfectly with the other ingredients in the Banana Sushi Recipe.
Can I prep Banana Sushi Recipe ahead for parties?
For the best appearance, assemble banana sushi just before guests arrive. You can prep your toppings and spreads ahead of time to speed up assembly when you’re ready to serve.
Is this recipe gluten-free?
Yes, as long as you use certified gluten-free granola and check that your spreads are gluten-free, the Banana Sushi Recipe is a fantastic option for gluten-free snacking.
Final Thoughts
Give yourself a treat and whip up this Banana Sushi Recipe—you’ll love how easy, customizable, and downright delightful it is. Whether you make it for family snack time or a fun party platter, it’s sure to bring smiles all around. Happy snacking!
Print
Banana Sushi Recipe
- Total Time: 10 minutes
- Yield: 2 servings 1x
- Diet: Vegetarian
Description
Banana Sushi is a fun and delicious no-bake snack that combines ripe bananas coated with creamy peanut butter and rich Nutella, rolled in crunchy toppings like granola, shredded coconut, mini chocolate chips, and crushed nuts. This healthy and kid-friendly treat is perfect for a quick snack or a light dessert.
Ingredients
Main Ingredients
- 2 ripe bananas, peeled
- 1/4 cup creamy peanut butter
- 1/4 cup Nutella or chocolate hazelnut spread
Toppings
- 1/4 cup granola
- 2 tablespoons shredded coconut
- 2 tablespoons mini chocolate chips
- 2 tablespoons crushed nuts (optional)
- Honey for drizzling (optional)
Instructions
- Prepare the Bananas: Place peeled bananas on a cutting board ready for spreading.
- Spread the Spreads: Evenly coat one banana with creamy peanut butter and the other with Nutella, ensuring full coverage.
- Roll in Toppings: Roll each coated banana in your choice of granola, shredded coconut, mini chocolate chips, or crushed nuts, pressing gently so toppings stick well.
- Slice into Rounds: Slice the coated bananas into bite-sized pieces approximately 1/2 inch thick to resemble sushi rolls.
- Serve and Drizzle: Arrange the banana sushi pieces on a plate. Drizzle with honey if desired and serve immediately for best freshness.
Notes
- For a healthier version, use only peanut butter and roll bananas in granola or shredded coconut.
- To prevent bananas from browning, prepare banana sushi just before serving.
- This recipe is great as a kid-friendly, fun, and nutritious snack or dessert option.
- Use certified gluten-free granola if gluten sensitivity is a concern to maintain a gluten-free dish.
- Prep Time: 10 minutes
- Cook Time: 0 minutes
- Category: Snack
- Method: No-Cook
- Cuisine: American
Nutrition
- Serving Size: 1/2 banana roll
- Calories: 210
- Sugar: 13 g
- Sodium: 80 mg
- Fat: 11 g
- Saturated Fat: 3 g
- Unsaturated Fat: 7 g
- Trans Fat: 0 g
- Carbohydrates: 25 g
- Fiber: 3 g
- Protein: 4 g
- Cholesterol: 0 mg
