
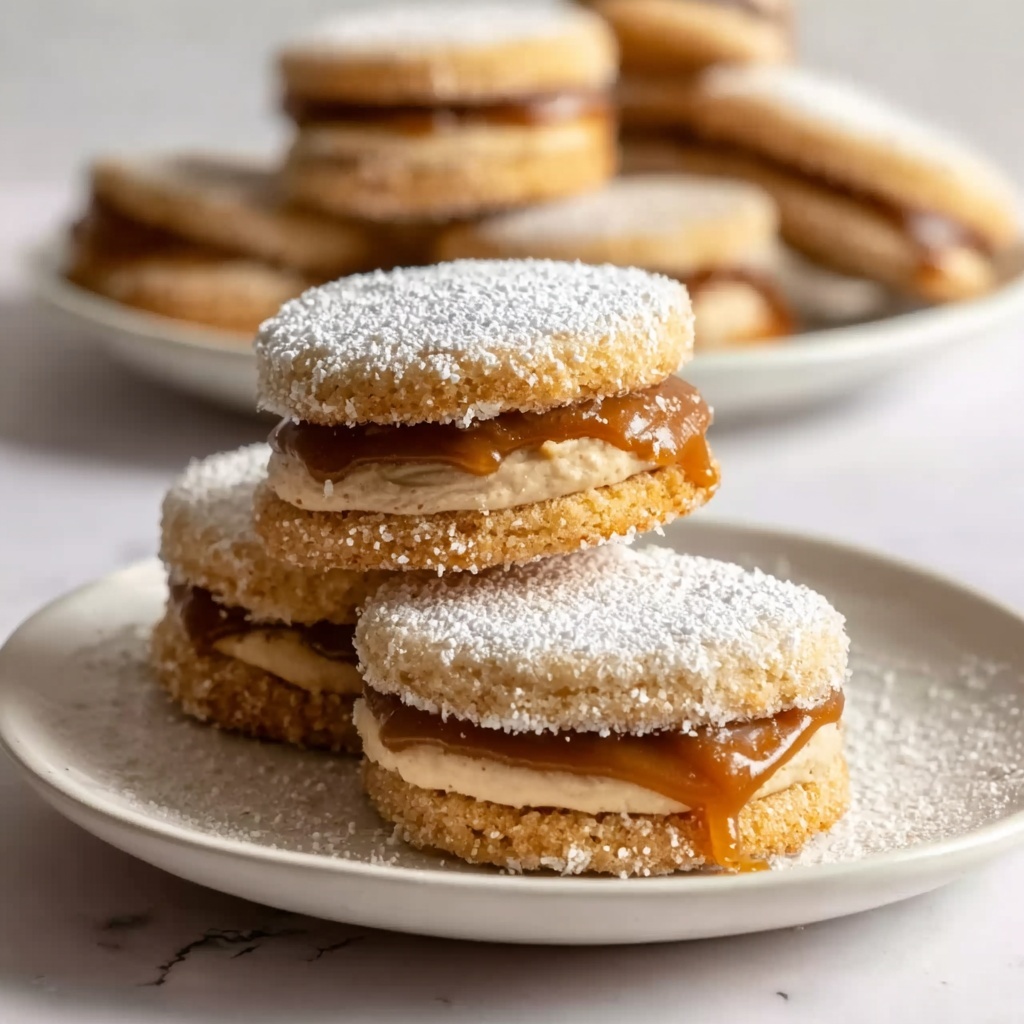
If you’re searching for a comforting, spiced treat that perfectly captures the cozy warmth of fall, let me introduce you to the Apple Cider Whoopie Pies Recipe. These delightful sandwich-style cakes are soft, fluffy, and bursting with the aromatic flavors of cinnamon, nutmeg, and real apple cider, all tied together with a luscious caramel sauce that brings in just the right touch of sweetness. Whether you’re baking for a holiday gathering or simply craving something special to enjoy with a hot cup of tea, this recipe promises a deliciously inviting experience that everyone will love.

Ingredients You’ll Need
Gathering your ingredients for this Apple Cider Whoopie Pies Recipe is a breeze because each element is straightforward yet essential, building layers of flavor, texture, and that beautiful autumn hue that will make these whoopie pies irresistible.
- 2 cups all-purpose flour: The base for the soft, tender cake of these whoopie pies, providing just the right structure.
- 1 tsp baking powder: This ensures your cakes will rise perfectly and be delightfully fluffy.
- 1 tsp ground cinnamon: Brings warm, spicy notes that embody the essence of fall.
- 1/2 tsp ground nutmeg: Adds depth to the spice profile, a subtle yet essential flavor.
- 1/4 tsp salt: Balances sweetness and enhances all the other flavors.
- 1/2 cup unsalted butter, softened: Gives richness and moisture to keep the cakes incredibly tender.
- 1 cup brown sugar, packed: Adds sweetness and a hint of caramel flavor, complementing the apple cider.
- 2 large eggs, at room temperature: Help bind ingredients and add lightness.
- 1 cup pure apple cider: The star of the show — infuses the cakes with bright, fruity moisture and subtle acidity.
- 1 cup caramel sauce: Used as the decadent filling that ties everything together with its silky, buttery sweet finish.
How to Make Apple Cider Whoopie Pies Recipe
Step 1: Preheat and Prepare
Start by preheating your oven to 350°F (175°C). Line your baking sheets with parchment paper to ensure your whoopie pies don’t stick and to make cleaning up a breeze. Proper prep here sets the tone for your baking success.
Step 2: Mix the Dry Ingredients
In a large bowl, whisk together the all-purpose flour, baking powder, cinnamon, nutmeg, and salt. Mixing these dry ingredients beforehand is key to distributing the spices evenly so every bite carries that perfect flavor.
Step 3: Cream Butter and Sugar
In another bowl, beat the softened butter and brown sugar on medium speed until light and fluffy. This should take about 3 to 4 minutes and is crucial for fluffiness; the creamed mixture traps air that helps your cakes rise beautifully.
Step 4: Add Eggs and Apple Cider
Beat in the eggs one at a time, making sure each is incorporated before adding the next. Then, pour in the apple cider, mixing until the batter is smooth and well combined. The cider adds a natural sweetness and moisture that make these whoopie pies extra special.
Step 5: Combine Wet and Dry
Gradually add the dry ingredients to the wet mixture, folding gently until just combined. Avoid overmixing to keep the cakes tender and soft — this step is all about gentle mixing for perfect texture.
Step 6: Bake the Cakes
Use a heaping tablespoon to scoop dough onto the prepared baking sheets, spacing them evenly. Bake for 12 to 15 minutes or until the cakes puff up and turn a lovely golden brown. The aroma filling your kitchen at this stage is simply irresistible.
Step 7: Cool and Fill
Once baked, transfer the whoopie cakes to wire racks to cool completely. Only when fully cooled, spread a generous dollop of caramel sauce on the flat side of one cake and sandwich it with another. The caramel is where these treats truly shine, making every bite decadent and delightful.
How to Serve Apple Cider Whoopie Pies Recipe
Garnishes
If you want to dress up your Apple Cider Whoopie Pies Recipe, consider sprinkling a little powdered sugar on top or adding a pinch of cinnamon over the caramel. For an extra festive touch, a drizzle of melted white chocolate complements the caramel beautifully and makes these treats look as good as they taste.
Side Dishes
These whoopie pies are sweet and satisfying on their own but also pair wonderfully with warm drinks. Serve alongside a hot mug of chai tea, chai latte, or even a spiced apple cider to amplify the autumn vibes. For a dessert platter, add some fresh apple slices or cinnamon spiced nuts as crunchy, refreshing complements.
Creative Ways to Present
Want to impress your guests? Stack a few whoopie pies on a rustic wooden board with small bowls of extra caramel sauce for dipping. Alternatively, wrap each one in colorful parchment and tie with twine for festive gift-giving—they’re truly charming little presents in edible form.
Make Ahead and Storage
Storing Leftovers
Your whoopie pies will keep well if stored in an airtight container at room temperature for up to two days. If your kitchen is warm or humid, the fridge is your friend, extending freshness for about 4 days. Just remember to bring them back to room temperature before serving for the best flavor and texture.
Freezing
These Apple Cider Whoopie Pies Recipe treats freeze wonderfully for up to 3 months. Separate the pies with parchment paper and place in a sealed freezer bag or container. When you’re ready, thaw them overnight in the refrigerator and then enjoy—they taste almost as fresh as the day you made them.
Reheating
If you want to enjoy a slightly warmed whoopie pie, especially after refrigeration or freezing, gently heat it in a microwave for about 10-15 seconds. Warming enhances the softness of the cake and makes the caramel gooey, bringing back that freshly-baked goodness effortlessly.
FAQs
Can I substitute the apple cider with something else?
If you don’t have apple cider on hand, you can substitute with apple juice mixed with a bit of lemon juice or even a mild white grape juice, but the distinctive tang and spice notes come from real cider, so it’s worth using if you can.
Is it possible to make the caramel sauce from scratch?
Absolutely! While store-bought caramel sauce works wonderfully for ease, homemade caramel adds a personal touch. Just cook sugar until golden, add butter and cream carefully, and you have a rich, buttery sauce that’s perfect for filling these whoopie pies.
Can I make these whoopie pies gluten-free?
Yes, by replacing the all-purpose flour with a good gluten-free baking blend that includes xanthan gum, you can make delicious gluten-free whoopie pies. Just be mindful that baking times might vary slightly.
How do I know when the whoopie pies are done baking?
They should be puffed and lightly golden brown at the edges. Pressing the top gently should yield a slight bounce back. Be careful not to overbake, as they should remain soft and tender.
Can I use a different filling instead of caramel sauce?
Sure thing! Cream cheese frosting, maple buttercream, or even a spiced apple butter make fantastic alternatives, each bringing a unique flavor that complements the warm spices in the cakes.
Final Thoughts
This Apple Cider Whoopie Pies Recipe is truly one of those delightful finds that bring smiles every time you take a bite. The blend of tender spice cake with luscious caramel filling makes these treats perfect for any season, especially when you want to cozy up and savor something homemade and heartfelt. Grab your ingredients, and dive into baking — I promise these whoopie pies will become a beloved favorite in your dessert rotation!
Print
Apple Cider Whoopie Pies Recipe
- Prep Time: 10 minutes
- Cook Time: 15 minutes
- Total Time: 30 minutes
- Yield: 12 servings
- Category: Dessert
- Method: Baking
- Cuisine: American
Description
These Apple Cider Whoopie Pies are a delightful fall treat combining soft, spiced cake-like cookies with a luscious caramel sauce filling. Bursting with warm cinnamon and nutmeg flavors complemented by tangy apple cider, they make a perfect dessert for seasonal gatherings or cozy afternoons.
Ingredients
Dry Ingredients
- 2 cups all-purpose flour
- 1 tsp baking powder
- 1 tsp ground cinnamon
- 1/2 tsp ground nutmeg
- 1/4 tsp salt
Wet Ingredients
- 1/2 cup unsalted butter, softened
- 1 cup brown sugar, packed
- 2 large eggs, at room temperature
- 1 cup pure apple cider
Filling
- 1 cup caramel sauce
Instructions
- Preheat Oven: Preheat your oven to 350°F (175°C) and line baking sheets with parchment paper to prevent sticking and ensure even baking.
- Mix Dry Ingredients: In a medium bowl, whisk together the all-purpose flour, baking powder, ground cinnamon, ground nutmeg, and salt until well combined.
- Cream Butter and Sugar: In a separate large bowl, use a mixer to cream the softened unsalted butter and packed brown sugar together until the mixture is light and fluffy, about 3 to 4 minutes.
- Add Eggs and Apple Cider: Beat in the eggs one at a time, making sure each is fully incorporated before adding the next, then add the pure apple cider and mix until the batter is smooth.
- Combine Wet and Dry Mixtures: Gradually add the dry ingredient mixture into the wet ingredients, mixing just until combined to avoid overmixing which can toughen the whoopie pies.
- Scoop and Bake: Using a spoon or cookie scoop, place heaping tablespoons of dough onto the prepared baking sheets, spacing them evenly. Bake for 12 to 15 minutes or until the whoopie pies are puffed up and golden around the edges.
- Cool and Assemble: Allow the whoopie pies to cool on wire racks completely. Once cooled, pair them up and spread a generous amount of caramel sauce between two pies to make the filling. Serve and enjoy!
Notes
- For best flavor, use fresh apple cider rather than processed juice.
- Make sure the butter is softened to room temperature to cream properly with the brown sugar.
- Do not overmix the batter once the dry ingredients are added to keep the whoopie pies tender.
- The caramel sauce filling can be chilled slightly to firm up for easier spreading.
- Store the assembled whoopie pies in an airtight container at room temperature for up to 2 days or refrigerate for up to a week.


