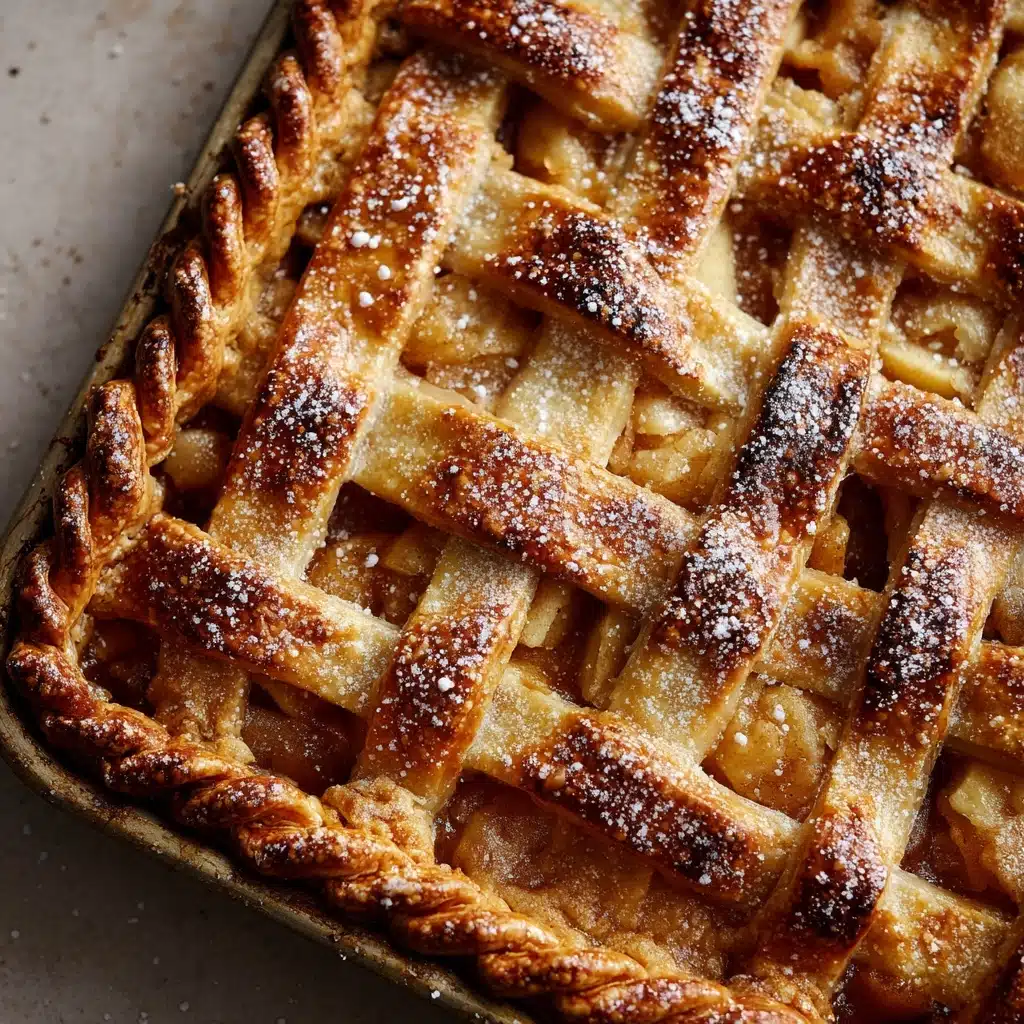
Apple Slab Pie Recipe
This Apple Slab Pie is the ultimate answer when you want all the wonder of homemade apple pie, but scaled up for a big, happy crowd. Imagine a golden, flaky crust cradling layers of juicy, cinnamon-spiced apples—every square perfect for sharing at a party or family gathering. It’s my go-to signature bake for fall get-togethers, potlucks, or any time the craving for cozy comfort strikes. The Apple Slab Pie always disappears in a flash and leaves everyone asking for the recipe!
Ingredients You’ll Need
There’s nothing fancy here—just staple ingredients, each playing a special role in making your Apple Slab Pie deeply flavorful, beautifully textured, and irresistible. Here’s what you’ll need to bring this crowd-pleasing classic to life:
- All-purpose flour: Offers the perfect structure and tenderness for a crust that’s sturdy enough to hold all those luscious apples.
- Granulated sugar: Adds sweetness to both the crust and filling, and helps the apples release their delicious juices.
- Salt: Balances the sweetness and brings out every subtle note of the apples and butter.
- Unsalted butter (cold and cubed): Essential for that perfectly crisp, flaky crust—don’t substitute here!
- Ice water: Keeps the pastry dough cold, resulting in magical layers in your baked crust.
- Peeled and thinly sliced apples (6–7 cups): The heart and soul of your Apple Slab Pie—choose a mix of Granny Smith and Honeycrisp for the right blend of tart and sweet.
- Light brown sugar: Adds a deep, mellow caramel note to the filling that’s pure autumn.
- Ground cinnamon: The classic spice that immediately says “apple pie”—don’t be shy!
- Ground nutmeg: Just a little lifts the entire flavor profile, giving a background warmth.
- Lemon juice: Brightens up the apples and keeps them from browning.
- Cornstarch: Thickens the filling, so you get neat slices with every cut.
- Milk or cream (for brushing): Ensures the top crust bakes up with a golden sheen.
- Coarse sugar (optional): Adds sparkle and a delightful crunch to the finished pie—highly recommended!
How to Make Apple Slab Pie
Step 1: Make and Chill the Crust
Start by whisking together your flour, sugar, and salt in a big bowl. Cut in your super-cold, cubed butter—it’s worth taking a few extra minutes to make sure the butter stays chilled! Aim for a texture that looks like coarse crumbs. Then, drizzle in ice water, just a tablespoon at a time, until the dough barely holds together. Divvy up the dough into two disks, wrap them in plastic, and tuck them into the fridge for at least 30 minutes. This step sets you up for crust success, ensuring all those flaky layers.
Step 2: Prepare the Baking Sheet and Roll the Bottom Crust
While your dough chills, preheat your oven to 375°F (190°C) and lightly grease a 10×15-inch rimmed baking sheet. On a floured surface, roll out one dough disk to fit the pan. Carefully lay it onto your baking sheet, gently pressing it into the bottom and up the sides. Don’t stress if the edges look a little rustic—this is a homey dessert and a little character just adds charm!
Step 3: Make the Filling
Toss your peeled, thinly sliced apples with both sugars, cinnamon, nutmeg, salt, lemon juice, and cornstarch. Don’t be tempted to skip the lemon juice; it makes the apple flavor pop! Spread the apple mixture evenly over your prepared crust. You want a nice, thick layer of apples here for maximum flavor.
Step 4: Add the Top Crust and Finish
Roll out your second disk of dough and gently place it over the apples. Trim any overhang and pinch or crimp the edges to seal in all that juicy apple goodness. Cut a few slits in the top crust—these little vents let steam escape so your Apple Slab Pie bakes up perfectly. Brush the top lightly with milk or cream, then sprinkle with coarse sugar if you’d like a sparkly, crunchy finish.
Step 5: Bake and Cool
Slide your pie into the oven and bake for 45–50 minutes, or until the crust is beautifully golden and the filling is bubbling through those slits. Let your slab pie cool a bit before you cut it into squares. This helps the filling set and makes serving a breeze—though no one will blame you if you sneak a warm piece straight from the pan!
How to Serve Apple Slab Pie

Garnishes
For an extra flourish, I love dusting each slice of Apple Slab Pie with powdered sugar, or serving it with a generous scoop of vanilla ice cream right on top. A drizzle of warm caramel sauce never hurts, and a dollop of softly whipped cream turns every piece into a mini celebration.
Side Dishes
While Apple Slab Pie is a showstopper on its own, it’s absolutely lovely alongside a fruit salad for brunch, or paired with a classic pot of coffee or spiced tea for afternoon gatherings. For a more indulgent dessert spread, offer it next to salted caramel brownies or pumpkin bread.
Creative Ways to Present
Try cutting your Apple Slab Pie into neat squares and wrapping them in parchment for picnic-perfect hand pies! For parties, arrange mini pieces on a big platter with bowls of caramel dip and whipped cream for DIY fun. You can even use mini cookie cutters to create festive shapes from the top crust for a playful, decorative effect.
Make Ahead and Storage
Storing Leftovers
If you’re lucky enough to have leftovers, just cover the pan with foil or transfer slices to an airtight container. Your Apple Slab Pie will stay fresh and delicious at room temperature for a day, or in the refrigerator for up to 4 days—though it rarely lasts that long in my house!
Freezing
For longer storage, wrap fully cooled squares individually in plastic wrap and tuck them into a freezer bag. They’ll keep beautifully for up to 2 months. Thaw at room temperature or gently warm in the oven to bring back that “just baked” magic.
Reheating
To enjoy the next day, reheat individual slices in the microwave for 15–20 seconds, or pop larger portions into a 300°F (150°C) oven for about 10 minutes. The crust will re-crisp and your kitchen will fill with that cozy, fresh-baked pie aroma all over again.
FAQs
Can I use a different type Dessert
Absolutely! While I love the tart-sweet combo of Granny Smith and Honeycrisp, any firm, baking-friendly apple will work. Try Fuji, Jonagold, or Pink Lady for fun flavor variations. Mixing a few types makes the filling extra interesting.
Do I have to peel the apples?
If you’re after a softer, more classic filling, peeling is best. But honestly, you can leave the peels on for a more rustic look and a boost of fiber. Just be sure to slice them thinly for a tender bite.
Is it possible to make Apple Slab Pie dough ahead of time?
Yes, the dough can be made one or two days in advance! Keep it tightly wrapped in the fridge until you’re ready to roll. It can even be frozen for up to 2 months—just thaw in the fridge before using.
Can I prepare the entire Apple Slab Pie in advance?
You sure can! It tastes fabulous on day two, so feel free to bake it the night before your gathering. If you want it slightly warm, just reheat as described above before serving.
How do I keep the bottom crust from getting soggy?
A well-greased baking sheet helps, but the real trick is cornstarch in the filling and slicing your apples thinly. Make sure to bake until you see the filling bubbling, which signals that the crust has had time to cook through.
Final Thoughts
There’s nothing quite like pulling a piping-hot Apple Slab Pie out of the oven and sharing it with the people you love. It’s easy to make, feeds a crowd, and always brings smiles. If you’ve never tried baking a slab pie, this is the recipe to start with—trust me, it’ll soon be your family’s new favorite tradition. Happy baking!
Print
Apple Slab Pie Recipe
- Total Time: 1 hour 20 minutes plus chilling
- Yield: 12–15 servings 1x
- Diet: Vegetarian
Description
This Apple Slab Pie recipe is a delicious twist on traditional apple pie, perfect for feeding a crowd. With a buttery crust, sweet apple filling, and a hint of warm spices, it’s a delightful fall dessert that’s sure to impress.
Ingredients
For the Crust:
- 2 ½ cups all-purpose flour
- 1 tablespoon granulated sugar
- 1 teaspoon salt
- 1 cup unsalted butter (cold and cubed)
- 6–8 tablespoons ice water
For the Filling:
- 6–7 cups peeled and thinly sliced apples (Granny Smith, Honeycrisp, or a mix)
- 3/4 cup granulated sugar
- 1/4 cup light brown sugar
- 1 ½ teaspoons ground cinnamon
- 1/4 teaspoon ground nutmeg
- 1/4 teaspoon salt
- 1 tablespoon lemon juice
- 1 tablespoon cornstarch
For the Topping:
- 1 tablespoon milk or cream (for brushing)
- 1 tablespoon coarse sugar (optional)
Instructions
- Prepare the Crust: In a large bowl, whisk together the flour, sugar, and salt. Cut in the butter until the mixture resembles coarse crumbs. Add ice water gradually until the dough holds together. Divide and chill for 30 minutes.
- Assemble the Pie: Roll out one dough disk to fit the pan, add apple filling, then top with second dough disk. Seal edges, vent the top, and brush with milk. Sprinkle with sugar.
- Bake: Bake at 375°F (190°C) for 45–50 minutes until golden and bubbly. Cool before serving.
Notes
- This pie is great for preparing ahead and serving at gatherings. Enjoy it warm or at room temperature with ice cream or whipped cream. Drizzle with caramel for an extra treat!
- Prep Time: 30 minutes
- Cook Time: 50 minutes
- Category: Dessert
- Method: Baking
- Cuisine: American
Nutrition
- Serving Size: 1 slice
- Calories: 310
- Sugar: 18g
- Sodium: 160mg
- Fat: 15g
- Saturated Fat: 9g
- Unsaturated Fat: 5g
- Trans Fat: 0g
- Carbohydrates: 43g
- Fiber: 3g
- Protein: 3g
- Cholesterol: 35mg


