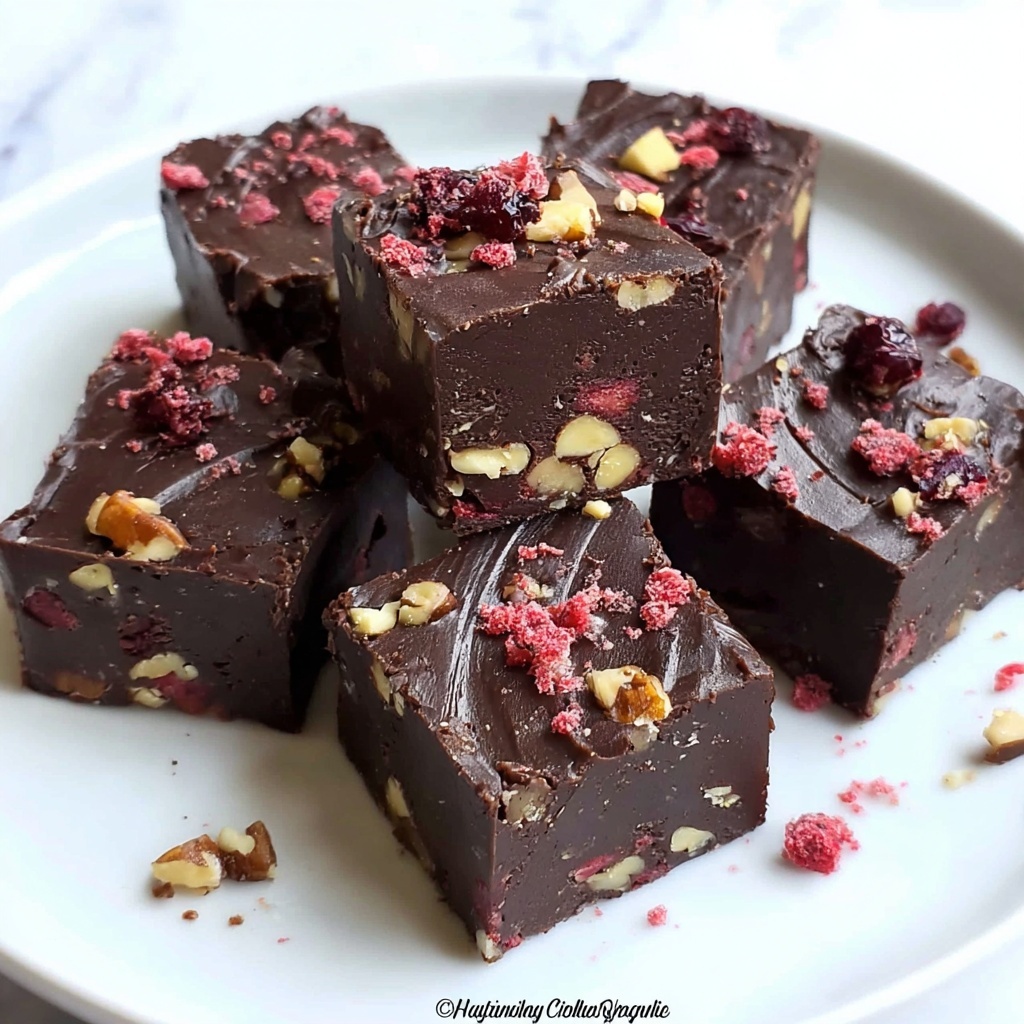
There is something incredibly delightful about the Cherry Garcia Fudge Recipe that combines luscious chocolate, juicy cherries, and crunchy walnuts into one irresistible treat. This fudge brings the classic Cherry Garcia ice cream vibe into a rich, creamy, and perfectly textured dessert that feels like a celebration in every bite. If you’re craving a sweet that’s as indulgent as it is comforting, this recipe will quickly become your go-to for sharing with friends or savoring on your own.
Ingredients You’ll Need
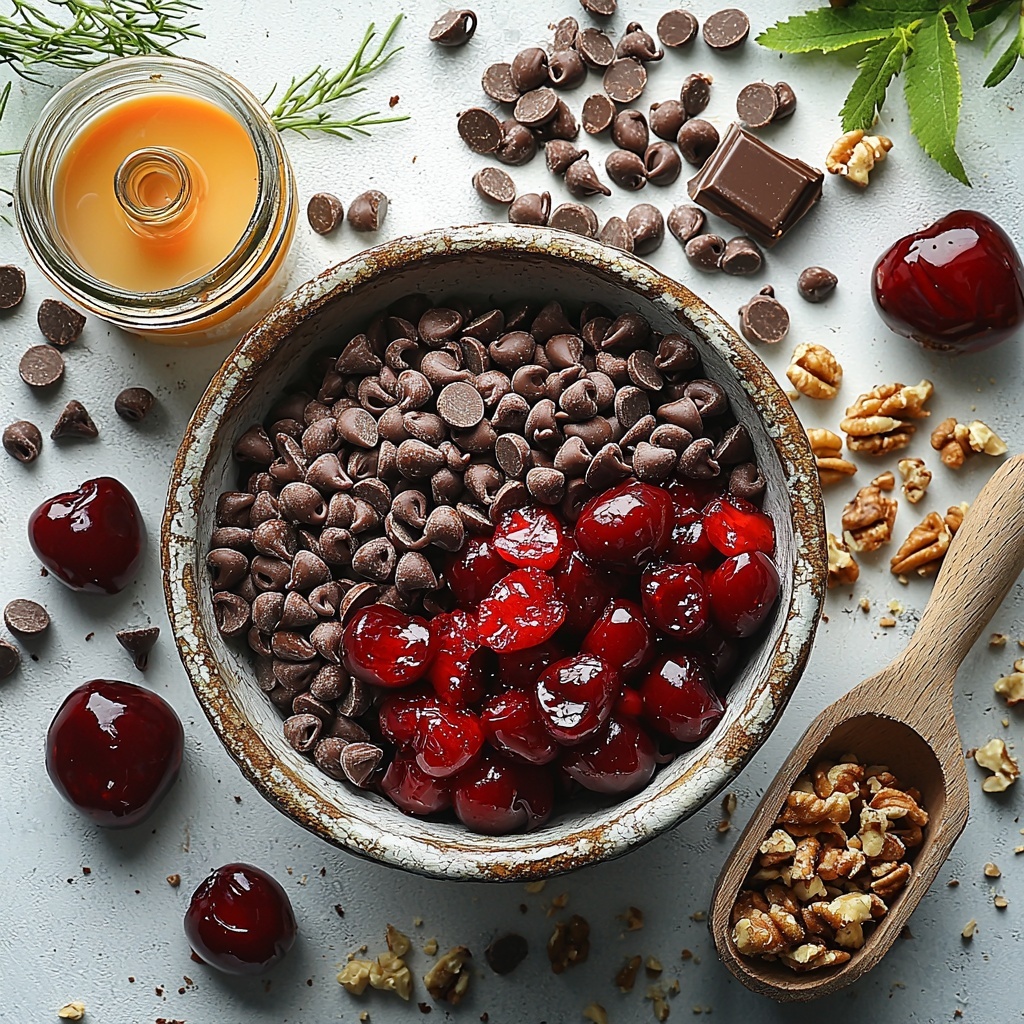
Gathering simple yet essential ingredients is the first step toward creating a perfect batch of Cherry Garcia fudge. Each component plays a key role in balancing flavors and textures—from the rich depth of chocolate to the bright bursts of cherries and the satisfying crunch of walnuts.
- 2 cups semisweet chocolate chips: Provides the creamy, smooth chocolate base that everyone loves.
- 1 cup sweetened condensed milk: Adds sweetness and a silky texture, holding the fudge together beautifully.
- 1/2 cup chopped cherries: Infuses fruity bursts that brighten the rich chocolate.
- 1/4 cup chopped walnuts: Introduces a delightful crunch and nutty undertone to every bite.
- 1 teaspoon vanilla extract: Enhances all the flavors with a warm, aromatic note.
How to Make Cherry Garcia Fudge Recipe
Step 1: Prepare Your Pan
Start by lining an 8-inch square pan with parchment paper. This simple step ensures your fudge won’t stick, making it easier to lift out and cut into perfect squares once it sets. Plus, it saves you from any messy cleanups later on!
Step 2: Melt Chocolate and Condensed Milk
In a saucepan over low heat, melt the semisweet chocolate chips alongside the sweetened condensed milk. Stir gently and consistently to achieve a smooth, velvety mixture without burning the chocolate. This is where the magic starts as your fudge base comes alive.
Step 3: Combine Ingredients
Once your chocolate mixture is perfectly smooth, remove it from the heat. Now it’s time to fold in the chopped cherries, walnuts, and vanilla extract. Mixing these in while the fudge is still warm ensures those flavors mingle harmoniously, giving you that signature Cherry Garcia taste and texture in every bite.
Step 4: Pour and Set
Pour the fudge mixture evenly into the prepared pan, smoothing out the top gently with a spatula. This even layer makes your fudge look just as good as it tastes. Pop the pan into the refrigerator and let it chill for at least 2 hours until firm and set.
Step 5: Slice and Enjoy
Once your Cherry Garcia Fudge Recipe has hardened, lift it out using the parchment paper and cut into 16 squares. Each piece is a perfect balance of creamy chocolate, fruity cherry, and crunchy walnut—ready to enjoy alone or with a friend.
How to Serve Cherry Garcia Fudge Recipe
Garnishes
To elevate your fudge experience, consider adding a sprinkle of finely chopped walnuts or a few whole cherries on top before serving. This not only looks inviting but adds a fresh crunch and pop of fruitiness that complements the rich fudge beautifully.
Side Dishes
Pair your Cherry Garcia fudge with a scoop of vanilla ice cream or a cup of freshly brewed coffee. The cool creaminess of ice cream or the robust, warm notes from coffee make a lovely contrast and bring out the fudge’s complex flavors.
Creative Ways to Present
For a festive touch, arrange your fudge squares on a decorative platter with some edible flowers or fresh mint leaves around them. You could even serve smaller bite-sized cubes on toothpicks as charming party treats that get everyone excited to dig in.
Make Ahead and Storage
Storing Leftovers
Leftover Cherry Garcia fudge keeps wonderfully in an airtight container at room temperature or in the fridge for up to one week. Just be sure to keep it sealed tight to maintain that perfect creamy texture and prevent it from absorbing any unwanted odors.
Freezing
If you want to store your fudge for longer, freezing is a great option. Wrap individual pieces in plastic wrap, then place them in a freezer-safe bag or container. Properly stored, they’ll keep their flavor and texture for up to three months.
Reheating
While fudge is best enjoyed cold or at room temperature, if you prefer a softer texture, gently warm a square in the microwave for 10 seconds. Be cautious to avoid overheating, which can melt the fudge too much and change the texture.
FAQs
Can I use fresh cherries for this recipe?
Fresh cherries can work but they add extra moisture, which might affect the fudge’s texture. It’s best to use dried or chopped preserved cherries to keep the fudge firm and flavorful.
Is it possible to make this fudge vegan?
This Cherry Garcia Fudge Recipe relies on sweetened condensed milk and chocolate, which typically contains dairy. However, you can try vegan substitutes such as coconut condensed milk and dairy-free chocolate chips for a plant-based version.
How long does it take for the fudge to set?
Refrigerating for at least 2 hours is ideal for the fudge to firm up completely, making it easier to cut and serve. If you’re short on time, chilling longer ensures the best results.
Can I substitute walnuts with other nuts?
Absolutely! Pecans, almonds, or even macadamia nuts can add different textures and flavors while keeping that delightful crunch in your Cherry Garcia Fudge Recipe.
What is the best way to cut fudge squares?
Using a sharp knife warmed slightly under hot water and wiped dry between cuts helps create neat, clean edges without crumbling the fudge.
Final Thoughts
If you’re looking for a sweet treat that’s both nostalgic and decadent, this Cherry Garcia Fudge Recipe is a must-try. With its perfect marriage of chocolate, cherries, and nuts, it’s sure to become a favorite in your dessert rotation. Go ahead, make a batch and share the joy of a truly delightful homemade fudge with those you love.
Print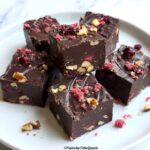
Cherry Garcia Fudge Recipe
- Prep Time: 10 minutes
- Cook Time: 10 minutes
- Total Time: 2 hours 20 minutes
- Yield: 16 servings
- Category: Dessert
- Method: Stovetop
- Cuisine: American
Description
Indulge in the rich and delightful Cherry Garcia Fudge, a luscious treat that combines the smoothness of semisweet chocolate with the fruity burst of chopped cherries and the crunch of walnuts. Perfectly balanced with sweetened condensed milk and a touch of vanilla, this no-bake fudge delivers pure bliss in every bite.
Ingredients
Fudge Base
- 2 cups semisweet chocolate chips
- 1 cup sweetened condensed milk
- 1 teaspoon vanilla extract
Mix-ins
- 1/2 cup chopped cherries
- 1/4 cup chopped walnuts
Instructions
- Prepare the pan: Line an 8-inch square pan with parchment paper to ensure easy removal of the fudge once it sets.
- Melt chocolate mixture: In a saucepan over low heat, combine the semisweet chocolate chips and sweetened condensed milk. Stir continuously until the mixture is smooth and well combined, making sure the chocolate does not burn.
- Add flavorings and mix-ins: Remove the saucepan from heat, then gently fold in the chopped cherries, chopped walnuts, and vanilla extract, ensuring they are evenly distributed throughout the chocolate base.
- Set the fudge: Pour the chocolate mixture into the prepared pan, spreading it evenly with a spatula to create a uniform layer.
- Chill and serve: Refrigerate the pan for at least 2 hours or until the fudge is firm. Once set, cut into 16 squares and serve chilled for the best texture and flavor.
Notes
- For best results, use fresh or well-drained cherries to avoid excess moisture in the fudge.
- You can substitute walnuts with pecans or almonds according to your preference.
- Store the fudge in an airtight container in the refrigerator for up to one week.
- Allow the fudge to sit at room temperature for a few minutes before serving to soften slightly.


