
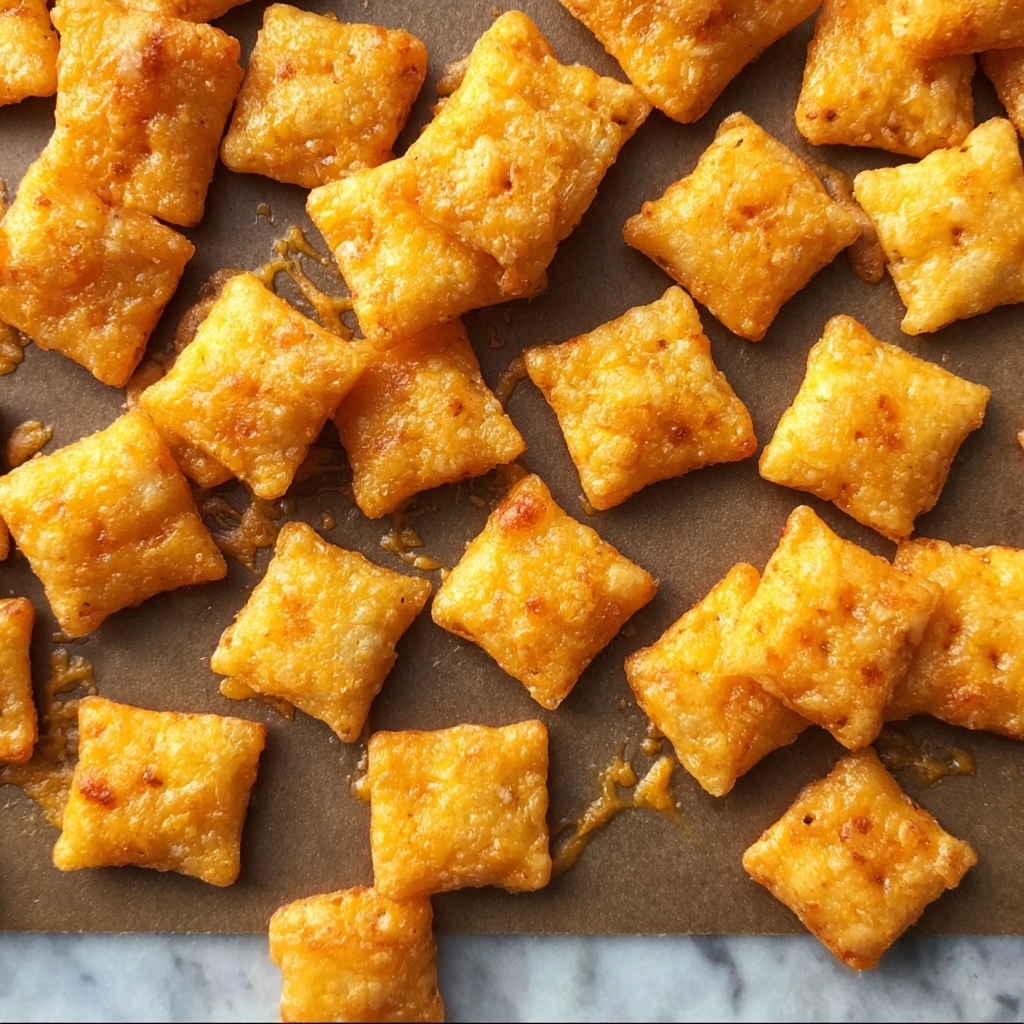
If you have ever craved that perfectly crispy, cheesy snack that hits all the right notes, then this Homemade Cheez-Its Recipe is about to become your new obsession. These crunchy little squares deliver all the sharp cheddar goodness you love, baked to golden perfection in your own kitchen. Freshly made, they have that intense, rich taste and satisfying snap that store-bought crackers simply cannot match. Whether you’re serving them at a party, packing them in a lunchbox, or just munching on them straight from the jar, this recipe is the ultimate way to enjoy a classic snack with a homemade touch.
Ingredients You’ll Need
These ingredients are straightforward and pantry-friendly, each playing a crucial role in making your Homemade Cheez-Its Recipe irresistibly delicious. The sharp cheddar brings bold flavor, while the flour creates structure, and the butter ensures that delicate, melt-in-your-mouth texture.
- Sharp cheddar cheese (8 ounces): Finely shredded for even melting and maximum cheesy flavor.
- All-purpose flour (1 cup): Provides the perfect base for the crackers’ structure and crispness.
- Cold unsalted butter (4 tablespoons, cubed): Adds richness and helps create a tender, flaky texture.
- Salt (1/2 teaspoon): Enhances all the flavors and balances the cheese’s sharpness.
- Paprika (1/4 teaspoon): Adds a subtle warmth and a touch of color for that signature look.
- Ice water (2 to 3 tablespoons): Helps bring the dough together without melting the butter.
- Garlic powder (1/4 teaspoon, optional): Introduces a gentle savory note to deepen the flavor.
How to Make Homemade Cheez-Its Recipe
Step 1: Preheat and Prepare
First thing’s first, get your oven warmed up to 375°F and line a baking sheet with parchment paper. This sets the stage for perfectly baked crackers and prevents sticking, giving you that flawless finish.
Step 2: Combine Ingredients
Pop the shredded cheddar, flour, cold butter cubes, salt, paprika, and garlic powder (if using) into a food processor. Pulse these until the mixture looks like coarse crumbs. This method ensures the butter stays cold, contributing to the ideal flaky texture.
Step 3: Form the Dough
Add the ice water, one tablespoon at a time, pulsing until the dough just starts to come together into a ball. The ice-cold water keeps the dough from getting too soft, which is key for those crisp, thin crackers.
Step 4: Roll and Cut
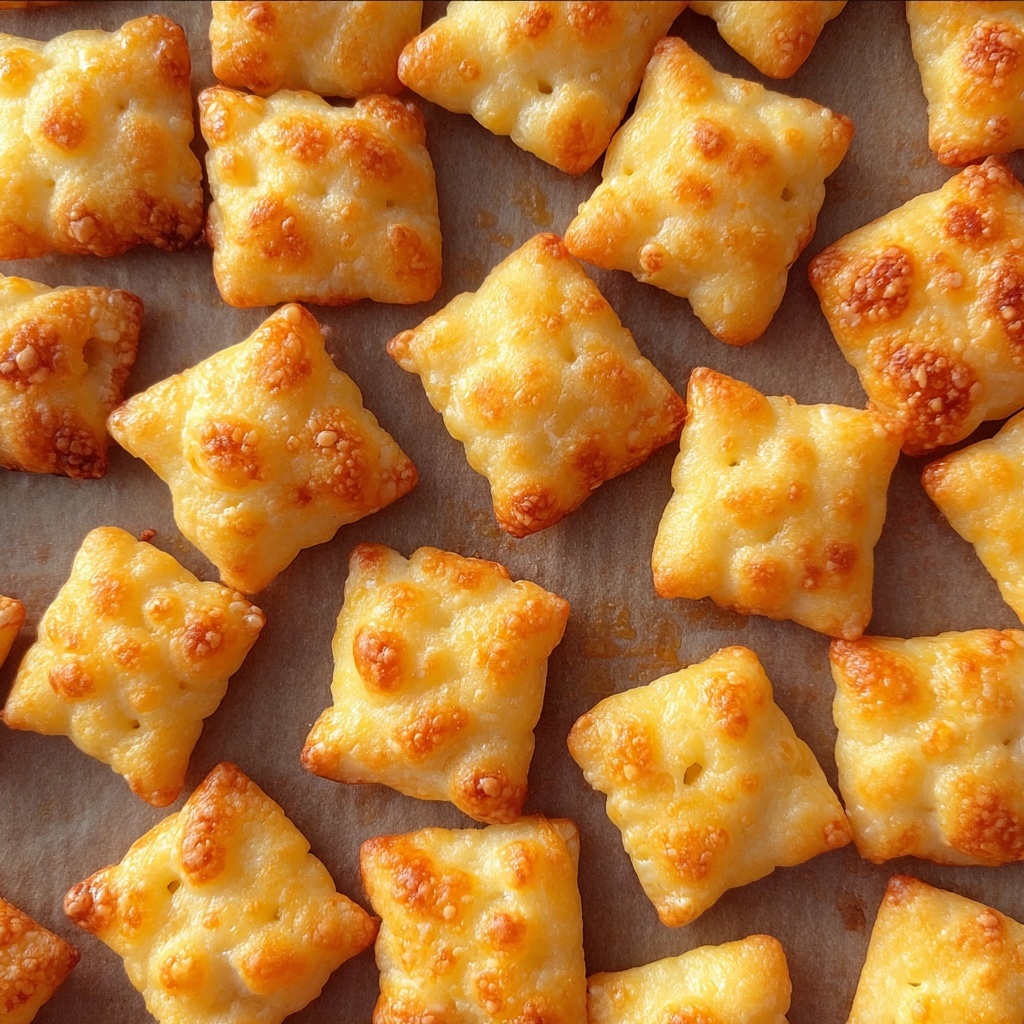
Transfer your dough to a lightly floured surface and roll it out super thin—about 1/8 inch thick. Then, use a pizza cutter or sharp knife to cut small 1-inch squares. Don’t forget to poke a small hole in the center of each with a toothpick to create that classic Cheez-Its appearance!
Step 5: Bake to Perfection
Arrange the squares on your prepared baking sheet, leaving a bit of space between each to help them bake evenly. Slip them into your oven and bake for 12 to 15 minutes until they’re beautifully crisp and just starting to turn golden around the edges.
Step 6: Cool Completely
Patience is key here—let your crackers cool fully on a wire rack. This step ensures they finish crisping up so that satisfying crunch is guaranteed every bite.
How to Serve Homemade Cheez-Its Recipe
Garnishes
A sprinkle of flaky sea salt right out of the oven can elevate your Homemade Cheez-Its Recipe, adding an extra burst of flavor. You could also dust them lightly with smoked paprika or chili powder for a smoky kick that will impress your guests.
Side Dishes
These crackers are a dream paired with creamy dips like spinach-artichoke dip, warm pimento cheese, or a rich tomato soup. They also make a fantastic crunchy contrast alongside fresh fruit and charcuterie boards.
Creative Ways to Present
Try stacking your Homemade Cheez-Its on a decorative platter with a small bowl of olive oil and herbs for dipping. Another fun idea is to mix them into a party snack mix with nuts, pretzels, and dried fruit for a savory twist everyone will enjoy.
Make Ahead and Storage
Storing Leftovers
Keep your Homemade Cheez-Its in an airtight container at room temperature, where they will stay fresh and crunchy for up to 5 days. This makes them perfect for prepping in advance for snacks throughout the week.
Freezing
If you want to make a big batch, these crackers freeze beautifully. Simply store them in a freezer-safe container or bag, separating layers with parchment paper. When you’re ready to enjoy, thaw at room temperature—no reheating needed!
Reheating
If your crackers lose a bit of their crunch, a few minutes in a low oven at 300°F will revive their crispness without drying them out. Just keep an eye on them so they don’t brown too much.
FAQs
Can I use a different type of cheese?
Absolutely! While sharp cheddar delivers the classic flavor, you can experiment with other cheeses like smoked gouda or parmesan for exciting variations. Just make sure to use a cheese that shreds well and has bold flavor.
Why does the dough need to be rolled so thin?
The thin dough ensures that the crackers bake evenly and get that perfect crisp texture. Thick dough would yield more biscuit-like results, which isn’t what you want for the authentic Homemade Cheez-Its experience.
What is the purpose of poking a hole in each cracker?
This little hole prevents the crackers from puffing up too much during baking and gives them their iconic look. It’s a simple step that makes a big difference in both texture and appearance.
Can I make these gluten-free?
Yes, replacing the all-purpose flour with a gluten-free flour blend that measures cup-for-cup can work well. Just pay attention to texture and adjust water amounts slightly if needed.
How long do these crackers stay fresh?
Stored properly in an airtight container, homemade Cheez-Its stay fresh and crunchy for about 5 days. After that, they might start to soften, but popping them in the oven briefly will bring back some of that crispness.
Final Thoughts
There is something truly satisfying about making your own Homemade Cheez-Its Recipe from scratch—crisp, cheesy, and bursting with bold flavor in every bite. This recipe is not only simple but deeply rewarding, turning everyday ingredients into a snack everyone will adore. Trust me, once you try these, you will never reach for the boxed version again. Happy baking and happier snacking!
Print
Homemade Cheez-Its Recipe
- Prep Time: 15 minutes
- Cook Time: 15 minutes
- Total Time: 30 minutes
- Yield: 6 servings
- Category: Snack
- Method: Baking
- Cuisine: American
- Diet: Vegetarian
Description
Homemade Cheez-Its are a deliciously crisp and cheesy snack made from sharp cheddar cheese and simple pantry ingredients. These crackers are baked to golden perfection, offering a flavorful bite that rivals store-bought versions, ideal for snacking anytime.
Ingredients
Cheese Crackers
- 8 ounces sharp cheddar cheese, finely shredded
- 1 cup all-purpose flour
- 4 tablespoons cold unsalted butter, cubed
- 1/2 teaspoon salt
- 1/4 teaspoon paprika
- 1/4 teaspoon garlic powder (optional)
- 2 to 3 tablespoons ice water
Instructions
- Preheat the oven and prepare baking sheet: Set your oven to 375°F and line a baking sheet with parchment paper to prevent sticking and ensure even baking.
- Combine dry ingredients and butter: In a food processor, add the shredded cheddar cheese, all-purpose flour, cold cubed butter, salt, paprika, and garlic powder if using. Pulse these ingredients until the mixture resembles coarse crumbs, which helps create the perfect crumbly texture for your dough.
- Add ice water and form dough: Gradually add ice water one tablespoon at a time into the food processor, pulsing after each addition until the mixture comes together to form a cohesive dough ball.
- Roll out the dough: Transfer the dough onto a lightly floured surface and roll it out as thin as possible, about 1/8 inch thick, to achieve the characteristic thin crispiness of Cheez-Its.
- Cut and shape crackers: Using a pizza cutter or sharp knife, cut the dough into 1-inch squares. Then, use the tip of a skewer or toothpick to poke a small hole in the center of each square to mimic the classic Cheez-It look.
- Arrange and bake: Place the cracker squares onto the prepared baking sheet, leaving a small space between each to allow for even cooking. Bake in the preheated oven for 12 to 15 minutes or until the edges turn lightly golden and the crackers are crisp.
- Cool and serve: Remove the crackers from the oven and let them cool completely on a wire rack to ensure they become extra crunchy before serving.
Notes
- Use extra sharp cheddar for the best and most pronounced flavor.
- Store homemade Cheez-Its in an airtight container for up to 5 days to maintain freshness.
- For a spicy twist, add a pinch of cayenne pepper to the dough mixture.
