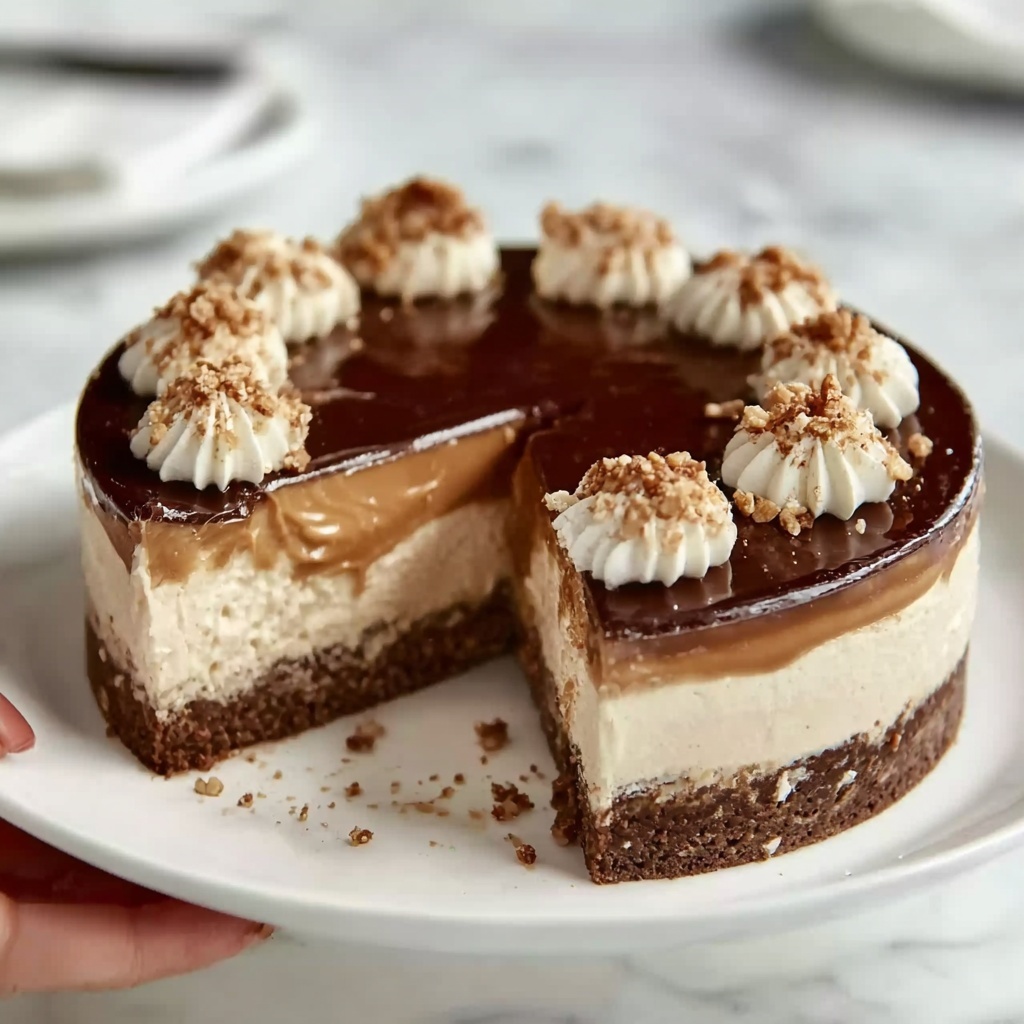
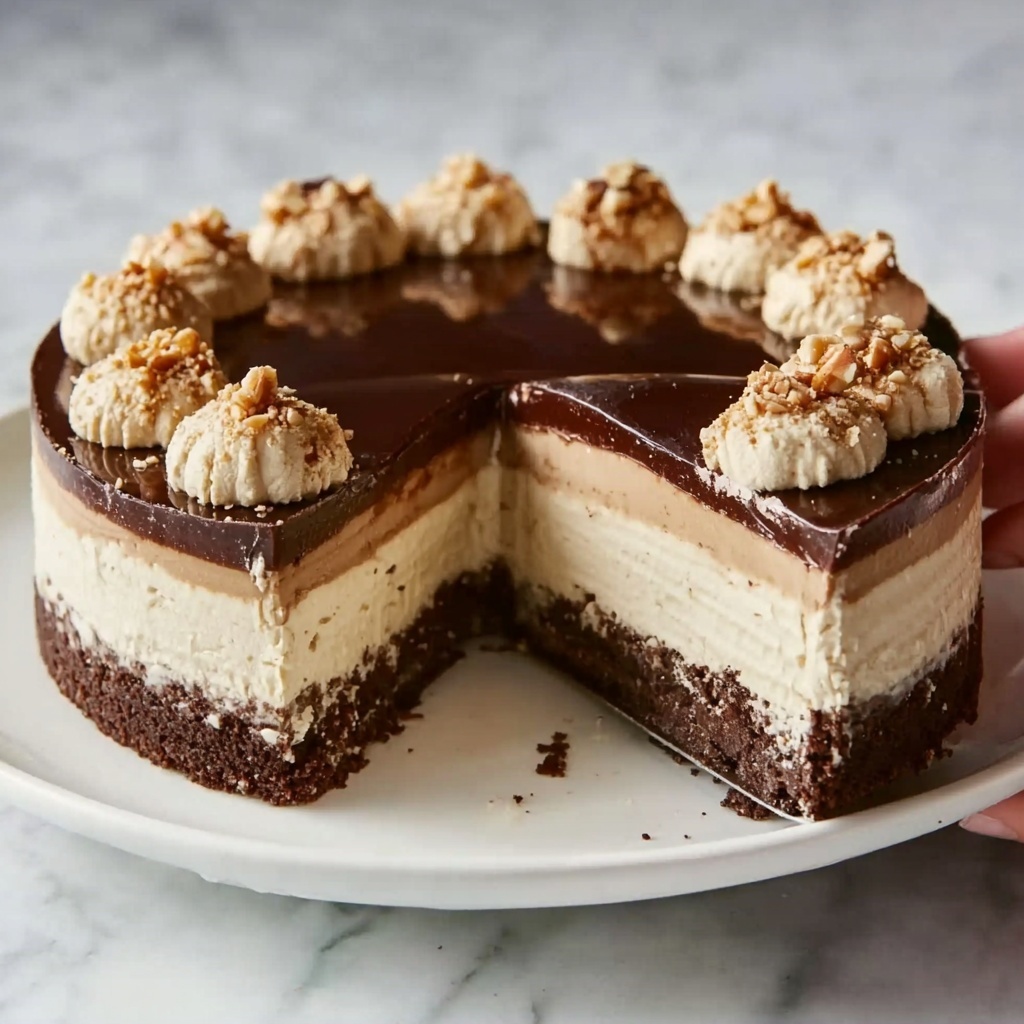
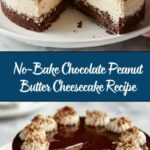
If you have a serious sweet tooth and love the classic combo of chocolate and peanut butter, you are going to fall head over heels for this No-Bake Chocolate Peanut Butter Cheesecake Recipe. Imagine a velvety, dreamy peanut butter filling that’s perfectly balanced with rich chocolate, all resting on a crispy, buttery cookie crust. It’s an absolute delight that comes together without any oven time, making it a lifesaver for warm days or last-minute dessert cravings. Trust me, once you try this luscious cheesecake, it’ll become your go-to treat for celebrations or just because.
Ingredients You’ll Need
This recipe is all about simplicity and quality ingredients. Each one plays a vital role in creating that irresistible texture and flavor combo that hooks you with every bite. From the crunchy cookie crust to the creamy peanut butter filling and the glossy chocolate topping, every component shines.
- Chocolate sandwich cookies, 24 crushed: Provides a crunchy, chocolatey base that sets the stage for the cheesecake.
- Unsalted butter, 1/4 cup melted: Binds the cookie crumbs together to form a sturdy yet tender crust.
- Cream cheese, 8 ounces softened: Gives the cheesecake its classic creamy texture and tangy depth.
- Creamy peanut butter, 1 cup: Adds rich, nutty flavor and luscious creaminess to the filling.
- Powdered sugar, 1 cup: Sweetens the filling smoothly without any graininess.
- Vanilla extract, 1 teaspoon: Enhances all the flavors with a warm, inviting aroma.
- Heavy cream, 1 cup whipped: Lightens the filling for a fluffy, airy texture that melts in your mouth.
- Semi-sweet chocolate chips, 1 cup melted: Used both for drizzling on top and adding a bittersweet contrast.
- Chopped peanuts, 1/2 cup for garnish: Adds an extra layer of crunch and nutty goodness.
- Chocolate syrup, for drizzling: A finishing touch that amps up the chocolate factor beautifully.
How to Make No-Bake Chocolate Peanut Butter Cheesecake Recipe
Step 1: Prepare the Crust
Start by mixing the crushed chocolate sandwich cookies with the melted butter in a medium bowl. This mixture forms the base of your no-bake cheesecake and must be packed firmly into the bottom of a 9-inch springform pan. Make sure to press it evenly and pack it tight enough so your crust holds together beautifully once chilled. Pop it into the fridge to chill while you work on the luscious filling.
Step 2: Whip Up the Creamy Filling
In a large mixing bowl, beat together the softened cream cheese, creamy peanut butter, powdered sugar, and vanilla extract until you get a perfectly smooth and creamy mixture. This step is key to ensuring the filling is silky with no lumps, which makes every bite so decadent and enjoyable.
Step 3: Fold in the Whipped Cream
Gently fold the whipped heavy cream into your peanut butter and cream cheese mixture. Folding, instead of mixing vigorously, keeps the air in the whipped cream and helps maintain that light, fluffy texture that turns this cheesecake into a dreamy treat.
Step 4: Build Your Cheesecake
Spread your peanut butter filling evenly over the chilled crust in the springform pan. Smooth the top with a spatula so you get a neat, even layer that will look fantastic once set and ready to serve.
Step 5: Add the Chocolate and Peanuts
Drizzle the melted semi-sweet chocolate over the top of your cheesecake, letting it create beautiful ribbons and swirls. Next, sprinkle the chopped peanuts over the chocolate for extra texture and a delightful nutty kick that perfectly complements the creamy filling.
Step 6: Chill and Set
Cover the cheesecake with plastic wrap or a lid and refrigerate it for at least 4 hours, allowing all the flavors to meld and the filling to firm up. This chilling step is essential to achieving that perfect sliceable texture without any baking.
Step 7: Final Chocolate Syrup Drizzle
Just before serving, add a little flourish by drizzling chocolate syrup over the top. This adds an extra shiny, luscious layer of chocolate that makes the cheesecake even more irresistible.
How to Serve No-Bake Chocolate Peanut Butter Cheesecake Recipe

Garnishes
While chopped peanuts and chocolate syrup are classic garnishes, you can get creative here. Try adding some fresh berries like raspberries for a pop of color and tartness, or sprinkle crushed toffee bits for more crunch. A dollop of whipped cream on each slice always elevates the presentation and indulgence factor.
Side Dishes
This cheesecake shines as a dessert star, but pairing it with a light, fresh side like a simple mixed green salad with a balsamic vinaigrette can balance the richness. For a decadent approach, serve alongside hot espresso or a rich dark roast coffee to bring out the chocolate and peanut butter notes even more.
Creative Ways to Present
If you want to impress your guests, serve the cheesecake in clear glasses or mason jars for individual portions. Layer the crust, filling, and toppings for a stunning visual experience. You can also top it with edible gold flakes or shaved chocolate curls to give it an elegant finish.
Make Ahead and Storage
Storing Leftovers
Your No-Bake Chocolate Peanut Butter Cheesecake stays fresh and delicious when stored in an airtight container in the refrigerator. It’s best enjoyed within 3 to 4 days to keep the textures just right and preserve the full flavor of the peanut butter and chocolate.
Freezing
If you want to enjoy this dessert later, freezing is a fantastic option. Wrap the cheesecake tightly in plastic wrap and then foil to protect it from freezer burn. When you’re ready to eat, thaw it overnight in the refrigerator for best results. Keep in mind the texture might be slightly firmer but just as tasty.
Reheating
This cheesecake is best served chilled, so reheating isn’t necessary. If you prefer the chocolate topping a little melty, a brief warm-up of the chocolate drizzle or syrup before serving can add a lovely contrast, but otherwise, serve it straight from the fridge.
FAQs
Can I use crunchy peanut butter instead of creamy?
Absolutely! Using crunchy peanut butter will add a bit more texture to the filling, which some people really enjoy. Just be sure to blend it well with the cream cheese to keep the filling smooth where possible.
Is it possible to make this recipe gluten-free?
Yes! Simply swap out the chocolate sandwich cookies for a gluten-free chocolate cookie or biscuit alternative. The rest of the ingredients are naturally gluten-free, making this an easy switch.
How long does it take to set properly in the fridge?
You want to give it at least 4 hours, but overnight chilling is even better if you have the time. This allows the filling to firm up completely and all the flavors to develop deeply.
Can I double this recipe for a larger group?
Definitely. Just double all your ingredients and use a larger pan or two standard pans. Keep the chilling time the same, but make sure you have enough fridge space to keep it cold and set well.
What’s the best way to cut the cheesecake neatly?
For clean slices, run a knife under hot water, dry it off, and then cut through the cheesecake. Wiping the knife between cuts helps keep each slice looking perfect and avoids crumbly edges.
Final Thoughts
You really can’t go wrong with this No-Bake Chocolate Peanut Butter Cheesecake Recipe. It’s one of those magical desserts that impresses everyone while being delightfully simple to make. Whether it’s a special occasion or a treat to brighten up your day, give this recipe a try. Once you do, it might just become your dessert obsession, just like it did for me!
Print
No-Bake Chocolate Peanut Butter Cheesecake Recipe
- Prep Time: 20 minutes
- Cook Time: 0 minutes
- Total Time: 4 hours 20 minutes
- Yield: 10 servings
- Category: Dessert
- Method: No-Cook
- Cuisine: American
Description
This No-Bake Chocolate Peanut Butter Cheesecake combines the rich, creamy flavors of peanut butter and cream cheese with a crunchy chocolate cookie crust. Topped with melted chocolate, chopped peanuts, and a drizzle of chocolate syrup, this dessert is easy to prepare and perfect for any chocolate and peanut butter lover. It requires no oven time, setting in the refrigerator for a smooth, indulgent finish.
Ingredients
Crust
- 24 chocolate sandwich cookies, crushed
- 1/4 cup unsalted butter, melted
Filling
- 1 (8-ounce) package cream cheese, softened
- 1 cup creamy peanut butter
- 1 cup powdered sugar
- 1 teaspoon vanilla extract
- 1 cup heavy cream, whipped
Topping
- 1 cup semi-sweet chocolate chips, melted
- 1/2 cup chopped peanuts, for garnish
- Chocolate syrup, for drizzling
Instructions
- Prepare the crust: In a medium bowl, mix the crushed chocolate sandwich cookies and melted butter until well combined. Press this mixture firmly into the bottom of a 9-inch springform pan to form the crust. Place it in the refrigerator to chill while preparing the filling.
- Make the filling: In a large bowl, beat the softened cream cheese, creamy peanut butter, powdered sugar, and vanilla extract together until the mixture is smooth and creamy.
- Incorporate whipped cream: Gently fold the whipped heavy cream into the peanut butter and cream cheese mixture until fully combined and light.
- Assemble the cheesecake: Spread the peanut butter filling evenly over the chilled cookie crust in the springform pan, smoothing the top with a spatula.
- Add chocolate topping: Drizzle the melted semi-sweet chocolate chips over the top of the cheesecake to create a beautiful chocolate layer.
- Garnish: Sprinkle the chopped peanuts evenly over the melted chocolate for texture and added peanut flavor.
- Chill to set: Cover the cheesecake with plastic wrap or a lid and refrigerate for at least 4 hours, or until the cheesecake is fully set and firm.
- Serve: Before serving, drizzle chocolate syrup over the top for extra chocolate richness and presentation.
Notes
- For best results, ensure the cream cheese is softened at room temperature before mixing.
- You can substitute crunchy peanut butter if you prefer a bit more texture in the filling.
- Be careful not to overmix the whipped cream when folding it into the filling to maintain a light, airy texture.
- Chilling time is critical to allow the cheesecake to firm up properly since this is a no-bake recipe.
- Use a sharp knife warmed in hot water to slice the cheesecake for clean cuts.

