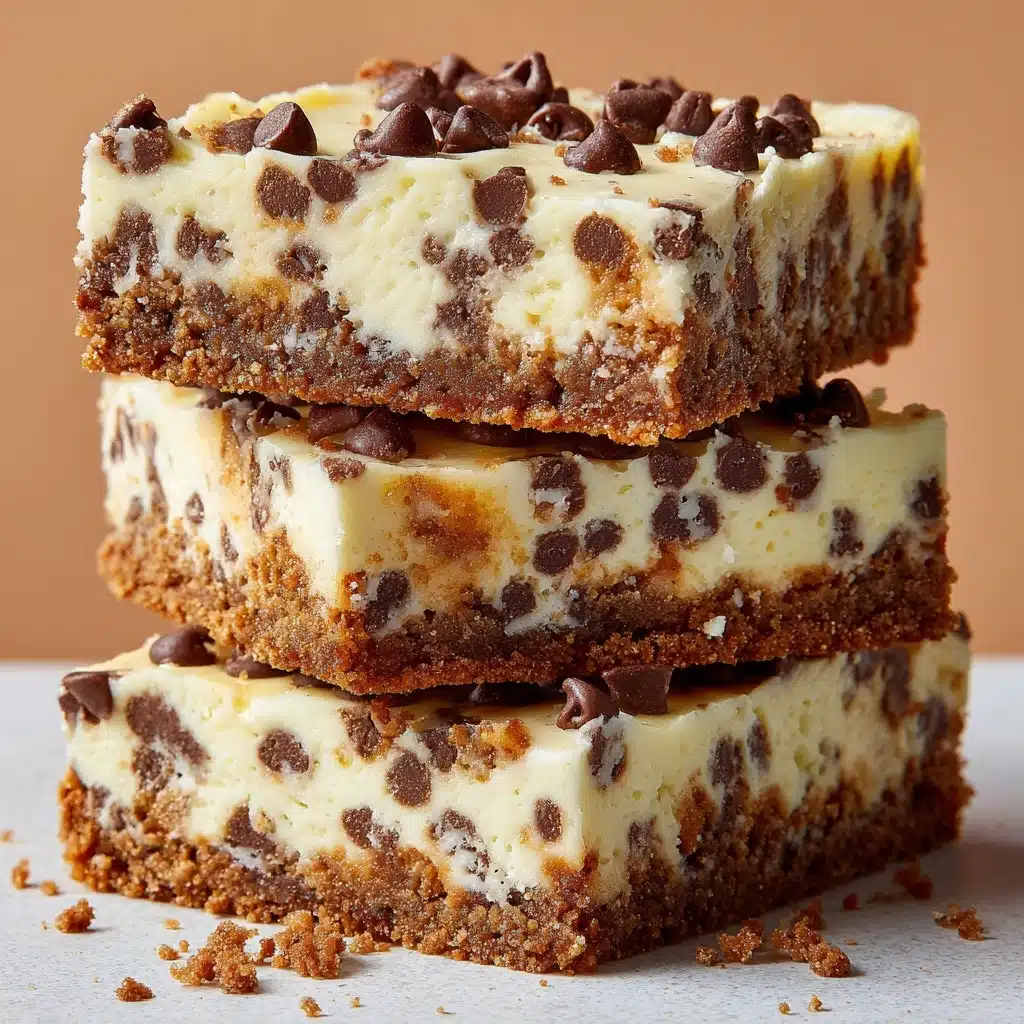
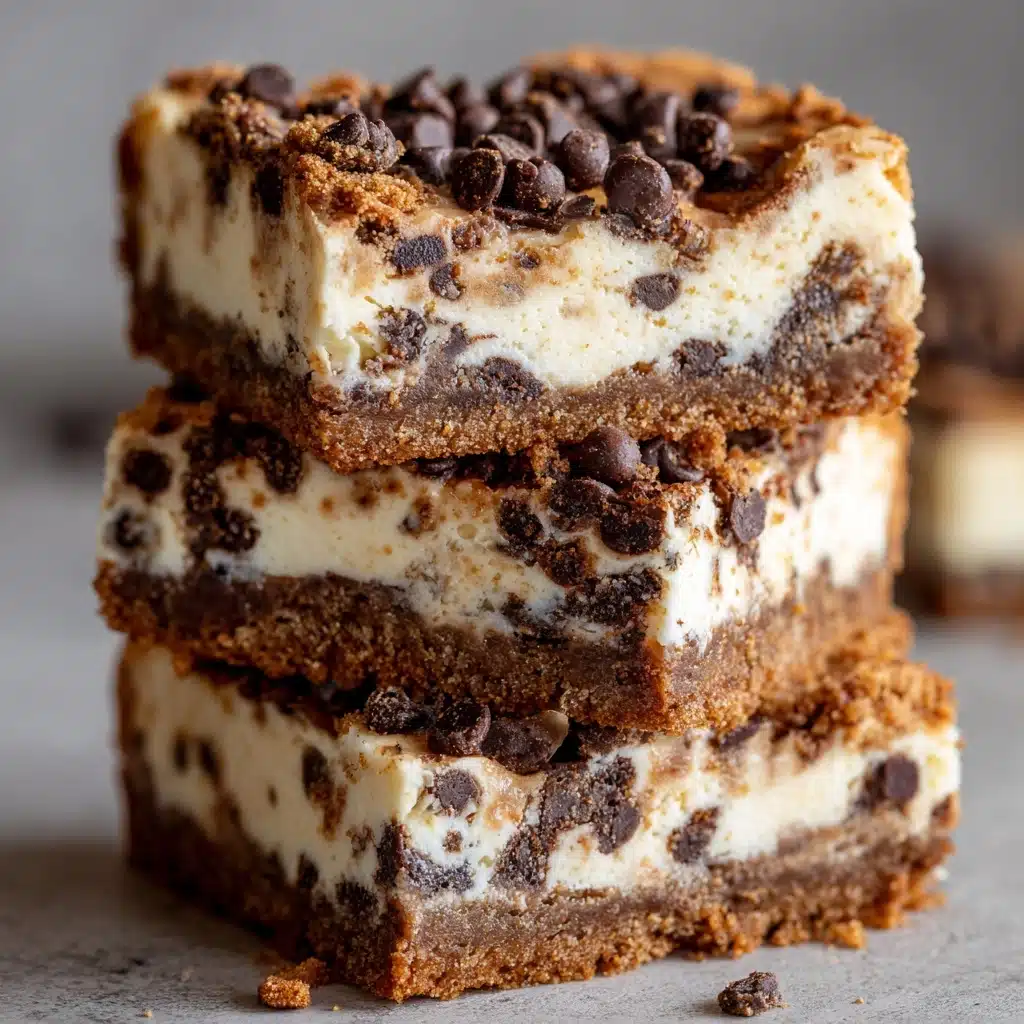
No-Bake Cookie Dough Cheesecake Bars Recipe
If you’re looking to satisfy a dessert craving without ever turning on your oven, these No-Bake Cookie Dough Cheesecake Bars truly deliver a slice of heaven! Imagine layers of buttery graham cracker crust, creamy cheesecake filling, and generous swirls of soft, chocolate-studded edible cookie dough. Every bite is the perfect mashup of nostalgic cookie dough flavor and luxurious cheesecake—no baking fuss required. With their melt-in-your-mouth texture and playful presentation, these bars are destined to be your new favorite treat when you want something indulgent, easy, and completely irresistible.
Ingredients You’ll Need
For these No-Bake Cookie Dough Cheesecake Bars, you only need a handful of kitchen staples, each playing a crucial role in taste and texture. Don’t skip or substitute—it’s the combination that brings the magic together!
- Graham cracker crumbs: The base of these bars, offering a classic cheesecake flavor with just the right crunch.
- Unsalted butter (melted): Helps the crust set perfectly and brings a rich, buttery undertone to each bite.
- Granulated sugar: Sweetens and binds the crust, adding just a touch of classic sweetness.
- Unsalted butter (softened): Essential for creamy, melt-in-your-mouth cookie dough.
- Brown sugar (packed): Brings warmth and depth to the cookie dough with its molasses notes.
- Vanilla extract: Adds that unmistakable, cozy bakery aroma to both dough and cheesecake layers.
- All-purpose flour (heat-treated): Provides that cookie dough texture—be sure to heat-treat for food safety!
- Milk: Just enough moisture for perfectly soft dough without making it sticky.
- Mini chocolate chips (divided): For chocolate in every bite—half in the dough, half as a topping!
- Cream cheese (softened): The heart and soul of the cheesecake layer for maximum creaminess.
- Powdered sugar: Sweetens the cheesecake filling smoothly without any graininess.
- Heavy cream (whipped to stiff peaks): Gives the cheesecake its dreamy, airy texture—don’t skip this step!
How to Make No-Bake Cookie Dough Cheesecake Bars
Step 1: Prepare Your Pan
Start by lining an 8×8-inch baking pan with parchment paper, making sure to leave enough overhang on the sides. This little trick will make lifting the bars out effortless when they’re done chilling.
Step 2: Make the Graham Cracker Crust
In a medium bowl, combine the graham cracker crumbs, melted butter, and granulated sugar. Mix until everything resembles wet sand. Press this mixture firmly into the bottom of your prepared pan—use the bottom of a measuring cup to get it really compact. Pop the pan in the fridge so the crust can set while you tackle the next steps.
Step 3: Whip Up the Cookie Dough
Grab another bowl and cream together the softened butter, brown sugar, and vanilla extract until it’s light and fluffy. Stir in the heat-treated flour and milk, mixing just until it forms a luscious dough. Fold in half of the mini chocolate chips, resisting the urge to taste (for now!). Set the dough aside.
Step 4: Make the Cheesecake Filling
In a large bowl, beat the softened cream cheese until completely smooth with no lumps. Add the powdered sugar and vanilla extract, then mix again until creamy. Next, gently fold in the whipped heavy cream—this creates a surprisingly light and airy cheesecake layer friends and family will rave about.
Step 5: Layer and Assemble
Spread half of your cheesecake mixture over the chilled crust, smoothing it out. Take the cookie dough and break off little pieces, scattering them generously across the cheesecake layer. Then spread the remaining cheesecake mixture on top, using a spatula to create an even, smooth finish. Sprinkle with the remaining mini chocolate chips for a final pop of color and flavor.
Step 6: Chill Before Slicing
All that’s left to do is refrigerate! Let the bars chill for at least 4 hours (overnight is even better). This step ensures tidy slices and that glorious layered look. Once firm, use the parchment paper to lift the bars from the pan, then slice and enjoy!
How to Serve No-Bake Cookie Dough Cheesecake Bars
Garnishes
Give each bar a playful bakery-style finish by adding a swirl of whipped cream, an extra sprinkle of mini chocolate chips, or a light dusting of cocoa powder. Even a drizzle of melted chocolate or caramel can transform these bars into a showstopping dessert centerpiece, perfect for birthdays or celebrations.
Side Dishes
Pair your No-Bake Cookie Dough Cheesecake Bars with a hot cup of coffee or a tall glass of milk for classic comfort. For a fancier touch, serve alongside fresh berries or a scoop of vanilla ice cream. The mild tang of fruit balances the sweet richness and makes for a truly memorable dessert experience.
Creative Ways to Present
You can easily turn these bars into bite-sized party treats by cutting them into small squares and serving on a platter with mini forks or toothpicks. Or, stack them up as a delightful dessert tower. For holidays, try layering the bars in clear jars or parfait glasses to show off their beautiful layers and really get those compliments coming!
Make Ahead and Storage
Storing Leftovers
Keep any remaining No-Bake Cookie Dough Cheesecake Bars covered in the refrigerator. Because of their rich dairy base, these bars are best enjoyed within five days—the crust stays crisp, and the cookie dough stays perfectly soft!
Freezing
To freeze, wrap bars tightly in plastic wrap and then place in an airtight container. They’ll keep beautifully for up to two months. Just thaw overnight in the fridge before serving for that same fresh-from-the-fridge taste and texture.
Reheating
No reheating required! These bars are at their best straight from the fridge. If frozen, allow them to defrost slowly in the refrigerator before slicing and serving, so the cheesecake and cookie dough layers stay wonderfully creamy and intact.
FAQs
Can I use a different cookie dough flavor?
Absolutely! While classic chocolate chip is always a hit, feel free to swap in peanut butter chips, white chocolate, or even tiny bits of toffee for your own twist.
Why is heat-treating the flour important?
Raw flour can contain harmful bacteria, so heating it until it reaches 165°F ensures your edible cookie dough in these No-Bake Cookie Dough Cheesecake Bars is safe for everyone to enjoy, especially kids.
Can I make these bars gluten-free?
Yes, swap in gluten-free graham crackers and use a gluten-free all-purpose flour blend for the cookie dough. Just check labels to make sure all your ingredients are certified gluten-free!
How do I get clean, professional-looking slices?
For the neatest slices, chill the bars overnight. Use a sharp knife dipped in hot water and wiped dry between each cut—this keeps the cheesecake and cookie dough layers looking perfect every time.
Can I double the recipe for a crowd?
You sure can! Make a double batch and use a 9×13-inch pan. Adjust chilling time as needed to ensure everything sets beautifully before slicing and serving.
Final Thoughts
There’s something truly magical about sharing these No-Bake Cookie Dough Cheesecake Bars with friends or family—the combination of creamy, crunchy, and that unforgettable cookie dough makes every bite pure joy. Don’t wait for a special occasion to try them; dive in and let their easy, no-bake charm brighten up any day!
Print
No-Bake Cookie Dough Cheesecake Bars Recipe
- Total Time: 4 hours 25 minutes
- Yield: 16 bars 1x
- Diet: Non-Vegetarian
Description
These No-Bake Cookie Dough Cheesecake Bars are a delightful dessert that combines the flavors of creamy cheesecake with edible cookie dough. With a graham cracker crust, a layer of chocolate chip cookie dough, and a luscious cheesecake topping, these bars are a perfect treat for any occasion.
Ingredients
Graham Cracker Crust:
- 1 1/2 cups graham cracker crumbs
- 1/2 cup unsalted butter, melted
- 1/4 cup granulated sugar
Cookie Dough Layer:
- 1/2 cup unsalted butter, softened
- 1/2 cup brown sugar, packed
- 1 teaspoon vanilla extract
- 1 cup all-purpose flour, heat-treated
- 2 tablespoons milk
- 1 cup mini chocolate chips, divided
Cheesecake Layer:
- 16 ounces cream cheese, softened
- 1 cup powdered sugar
- 1 teaspoon vanilla extract
- 1 cup heavy cream, whipped to stiff peaks
Instructions
- Prepare the Graham Cracker Crust: Line an 8×8-inch baking pan with parchment paper. Combine graham cracker crumbs, melted butter, and granulated sugar. Press into the bottom of the pan and refrigerate.
- Make the Cookie Dough Layer: Beat together softened butter, brown sugar, and vanilla. Add heat-treated flour and milk, then mix in 1/2 cup mini chocolate chips.
- Prepare the Cheesecake Layer: Beat cream cheese until smooth, then add powdered sugar and vanilla. Fold in whipped cream.
- Assemble: Spread half of the cheesecake mixture over crust. Crumble cookie dough over it, then top with remaining cheesecake mixture. Sprinkle with mini chocolate chips.
- Chill: Refrigerate for at least 4 hours before slicing into bars.
Notes
- Heat-treat the flour to 165°F before using it in the cookie dough.
- Store bars in the refrigerator and consume within 5 days.
- For easier slicing, chill bars overnight.
- Prep Time: 25 minutes
- Cook Time: 0 minutes
- Category: Dessert
- Method: No-Bake
- Cuisine: American
Nutrition
- Serving Size: 1 bar
- Calories: 310
- Sugar: 20 g
- Sodium: 150 mg
- Fat: 21 g
- Saturated Fat: 12 g
- Unsaturated Fat: 7 g
- Trans Fat: 0 g
- Carbohydrates: 29 g
- Fiber: 1 g
- Protein: 4 g
- Cholesterol: 55 mg

