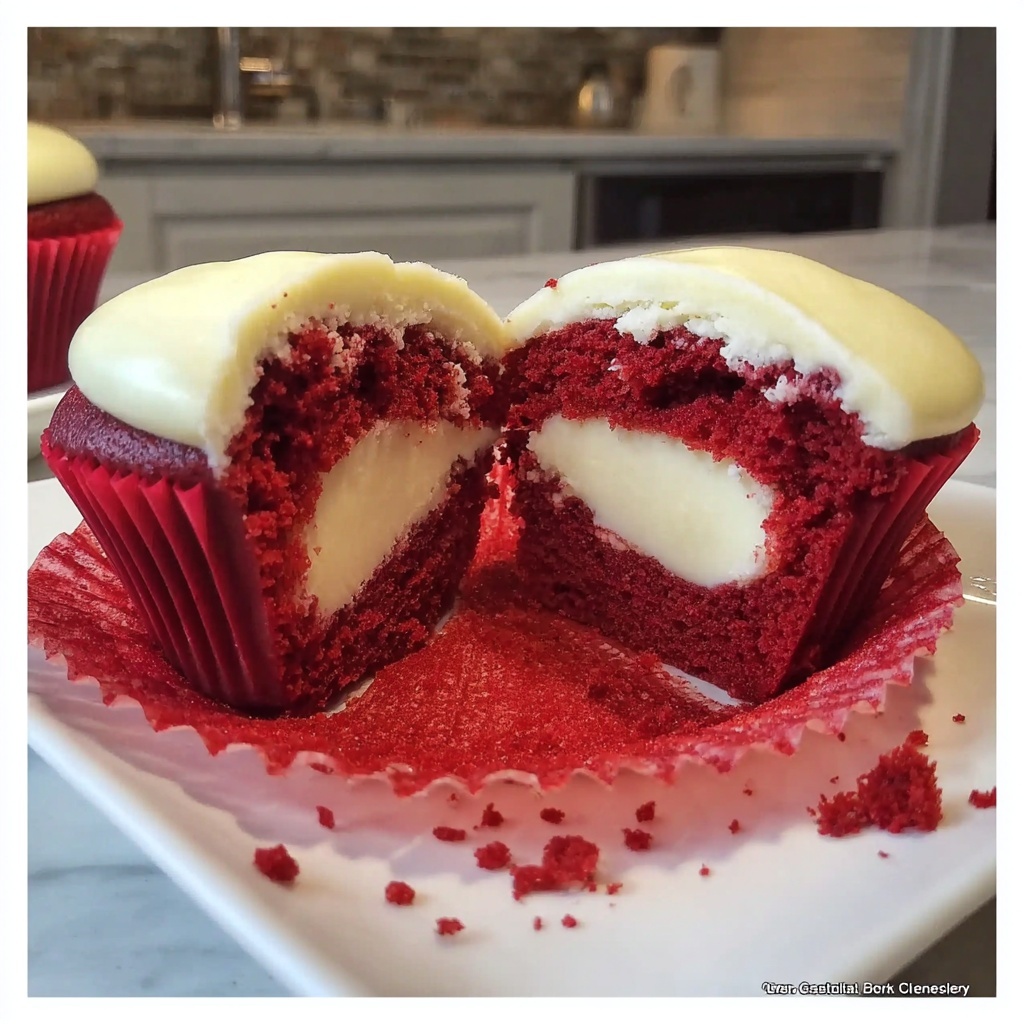
If you love the luscious, velvety charm of red velvet combined with the comforting, chewy goodness of a cookie, then you are in for a treat with this Red Velvet Cookie Cups Recipe. These delightful little cups capture everything that makes red velvet so special — its rich cocoa undertones, vibrant red color, and creamy frosting — all baked into a perfectly portioned cookie form. Whether you’re aiming to impress at a gathering or craving a cozy homemade dessert, this recipe strikes the perfect balance of fun, flavor, and that irresistible cream cheese frosting that ties it all together.

Ingredients You’ll Need
What makes this Red Velvet Cookie Cups Recipe so satisfying is the simplicity and thoughtfulness of its ingredients. Each one plays a crucial role in building flavor, texture, and that signature red hue that we all adore. From the creamy butter to the tangy cream cheese frosting, every component is essential.
- Unsalted butter: Provides a rich, creamy base that adds moisture and tenderness to the cookie cups.
- Granulated sugar: Helps with sweetness and creates a slight crunch on the edges for a perfect bite.
- Brown sugar: Adds a deeper, caramel-like flavor and keeps the cookies chewy.
- Large eggs: Bind ingredients together and contribute to the soft texture.
- Vanilla extract: Enhances the overall flavor with its warm, sweet aroma.
- All-purpose flour: The structure-builder that holds everything together.
- Cocoa powder: Adds that subtle chocolatey depth integral to any red velvet dessert.
- Baking soda: Helps the cookie cups rise just enough for that perfect shape.
- Salt: Balances sweetness and enhances all the other flavors.
- Red food coloring: Gives the cookie cups their signature, eye-catching red hue.
- Cream cheese: For the frosting, bringing that tangy richness every red velvet fan adores.
- Powdered sugar: Sweetens the frosting with a smooth, silky finish.
How to Make Red Velvet Cookie Cups Recipe
Step 1: Preheat and Prepare
Start by preheating your oven to 350°F (175°C). This ensures the oven is nice and hot when the dough goes in, helping the cookie cups bake evenly and develop a slight golden edge without overcooking.
Step 2: Cream the Butter and Sugars
Next, cream together the softened unsalted butter with both granulated and brown sugars. This step is vital — it traps air into the mixture, helping your cookie cups become delightfully tender and light.
Step 3: Add Eggs and Vanilla
Mix in the eggs one at a time along with a splash of vanilla extract. This combination adds moisture and aroma, making the cookies rich without weighing them down.
Step 4: Combine Dry Ingredients
In a separate bowl, whisk together the all-purpose flour, cocoa powder, baking soda, and salt. Mixing these dry ingredients independently helps them blend uniformly into the wet mixture, preventing clumps and ensuring even flavor distribution.
Step 5: Blend Dry and Wet Ingredients
Gradually stir the dry mixture into the wet ingredients. Doing this slowly helps maintain the tender structure of the dough while blending all those flavors together perfectly.
Step 6: Add the Red Food Coloring
Mix in the red food coloring thoroughly until an even, brilliant red dough forms. This vibrant color is what makes red velvet desserts so visually stunning and immediately appetizing.
Step 7: Fill the Muffin Tin
Grease a muffin tin generously, then scoop the dough into each cup. Be sure not to overfill—cookie cups need space to rise slightly and keep their cup shape for holding the luscious frosting.
Step 8: Bake to Perfection
Bake your cookie cups for 12 to 15 minutes. They should feel set but still soft to the touch. This short baking time ensures the cookies stay moist and tender, the hallmark of any excellent Red Velvet Cookie Cups Recipe.
Step 9: Cool Completely
Allow the cookie cups to cool entirely in the pan to firm up, so they can hold the frosting without collapsing. Patience here means a better presentation and texture once assembled.
Step 10: Prepare the Cream Cheese Frosting
In a bowl, mix together softened cream cheese, powdered sugar, and vanilla extract until smooth and creamy. This frosting is the star of the show, offering a tangy, luscious counterpart to the chocolatey, sweet cookie base.
Step 11: Pipe the Frosting
Once the cookie cups are fully cooled, pipe or spoon the cream cheese frosting into each cup generously. The contrast between the red velvet base and the creamy frosting will simply steal the spotlight at any table.
How to Serve Red Velvet Cookie Cups Recipe
Garnishes
Sprinkling a few festive garnishes can elevate your Red Velvet Cookie Cups Recipe from delicious to downright dazzling. Try topping with mini chocolate chips, red or white sprinkles, or even a dusting of cocoa powder or edible glitter. A fresh raspberry or a small mint leaf can add a fresh twist both visually and in flavor.
Side Dishes
Although these cookie cups are usually a perfect sweet snack on their own, pairing them with a light, cold beverage such as milk, coffee, or a rich hot chocolate makes for an indulgent treat time. For a party, consider serving alongside fresh fruit platters or vanilla ice cream for a full dessert experience.
Creative Ways to Present
Consider arranging these cookie cups in a colorful tiered dessert tray or placing them in bright cupcake liners for a birthday or holiday party. You can also insert a small decorative toothpick or a festive flag in the frosting for added charm and easy grabbing at gatherings.
Make Ahead and Storage
Storing Leftovers
To keep your cookie cups fresh, store them in an airtight container in the refrigerator. The cream cheese frosting requires cooler temperatures to stay firm, and the cookies themselves stay soft and flavorful for up to four days when properly stored.
Freezing
If you want to prepare these cookie cups ahead of time, you can freeze the baked, unfrosted cups in a single layer on a baking sheet until solid, then transfer to a freezer-safe container. Freeze for up to three months. Frost after thawing to maintain the best texture and flavor.
Reheating
When ready to eat, allow frozen cookie cups to thaw at room temperature for about an hour before frosting. If you prefer a warm treat, reheat unfrosted cookie cups in a 300°F oven for 5-7 minutes, then add frosting once cooled enough to handle.
FAQs
Can I use a different type of food coloring?
Absolutely! Gel food coloring works great for vibrant reds without adding too much moisture, but liquid food coloring can also be used. The key is to add enough for that signature red velvet color while adjusting for any extra liquid added.
What can I substitute for cream cheese in the frosting?
If cream cheese isn’t an option, you can try mascarpone cheese or a thick Greek yogurt to retain some tanginess and creaminess. Keep in mind this will alter the flavor slightly, but can still be delicious.
Can I make these cookie cups gluten-free?
Yes! Substitute the all-purpose flour with a gluten-free baking blend that has xanthan gum included. This will help maintain the cookie cups’ structure and texture.
How do I know when the cookie cups are fully baked?
They should appear set on the edges and slightly soft in the center when you remove them from the oven. If you gently press the center, it shouldn’t feel doughy but still tender. Overbaking will result in a dry texture, so keep an eye on the clock!
Can I double the recipe for a larger batch?
Definitely! This Red Velvet Cookie Cups Recipe scales well. Just be sure to mix in a larger bowl and possibly bake in batches to ensure even heat distribution and consistent baking.
Final Thoughts
This Red Velvet Cookie Cups Recipe is a delightful way to enjoy the flavors of red velvet in a fun, convenient form that’s perfect for sharing or savoring solo. It’s a recipe I return to again and again when I want something special yet straightforward to bake. I hope you’ll feel the same excitement when you taste these tender, creamy, and beautifully festive cookie cups. Give it a try—you’ll be amazed at how quickly they disappear!
Print
Red Velvet Cookie Cups Recipe
- Prep Time: 15 minutes
- Cook Time: 15 minutes
- Total Time: 30 minutes
- Yield: 24 cookie cups
- Category: Dessert
- Method: Baking
- Cuisine: American
Description
Delight in these Red Velvet Cookie Cups, a perfect fusion of rich red velvet flavor and creamy frosting. These bite-sized treats offer a soft, cocoa-infused cookie base with a luscious cream cheese frosting, ideal for parties or everyday indulgence.
Ingredients
Cookie Dough
- 1 cup unsalted butter, softened
- 1 cup granulated sugar
- 1 cup brown sugar, packed
- 2 large eggs
- 2 teaspoons vanilla extract
- 2 1/2 cups all-purpose flour
- 1 tablespoon cocoa powder
- 1 teaspoon baking soda
- 1 teaspoon salt
- 1 tablespoon red food coloring
Cream Cheese Frosting
- 1 cup cream cheese, softened
- 1/2 cup powdered sugar
- 1 teaspoon vanilla extract
Instructions
- Preheat oven: Preheat your oven to 350°F (175°C) to ensure it reaches the perfect temperature before baking.
- Cream butter and sugars: In a large bowl, cream together the softened unsalted butter, granulated sugar, and packed brown sugar until the mixture is light and fluffy.
- Add eggs and vanilla: Beat in the eggs one at a time, then stir in 2 teaspoons of vanilla extract until fully incorporated.
- Combine dry ingredients: In a separate bowl, whisk together the all-purpose flour, cocoa powder, baking soda, and salt to evenly distribute the leavening and cocoa.
- Mix dry into wet ingredients: Gradually add the dry ingredient mixture into the wet ingredients, mixing thoroughly but carefully not to overmix.
- Add red food coloring: Stir in the red food coloring until the dough is uniformly colored with a vibrant red hue.
- Prepare muffin tin: Grease a muffin tin lightly to prevent sticking, then scoop the dough into each cup evenly.
- Bake: Bake the dough-filled muffin tin in the preheated oven for 12-15 minutes, or until the cookie cups are set and a toothpick inserted comes out clean.
- Cool completely: Remove the cookie cups from the oven and allow them to cool fully in the tin or on a cooling rack before applying the frosting.
- Prepare frosting: In a separate bowl, mix the softened cream cheese, powdered sugar, and 1 teaspoon vanilla extract until smooth and creamy.
- Pipe frosting: Using a piping bag or a spoon, fill the cooled cookie cups with the cream cheese frosting, decorating as desired.
Notes
- Ensure butter and cream cheese are softened to room temperature to achieve a smooth batter and frosting.
- Use gel-based red food coloring for a more vibrant color without affecting dough consistency.
- Do not overbake; cookie cups should be soft and slightly chewy.
- These cookie cups can be stored in an airtight container in the refrigerator for up to 5 days.
- For a chocolate twist, add mini chocolate chips into the dough before baking.


